Rockpi4/install/eMMC/es es
ROCK Pi 4 > Install > Install on eMMC module
Contents
- 1 Método de actualización de la memoria eMMC mediante USB
- 2 Step1: Requisitos
- 3 Step 2: Download necessary tools and image
- 4 Step 3: Write the image to microSD card
- 5 Step 4: Boot on ROCK Pi 4
Método de actualización de la memoria eMMC mediante USB
Rockusb es un protocolo USB personalizado de Rockchip y soportado por ROCK Pi 4 que se usa para grabar la imagen del Sistema Operativo a instalar que tenemos en el ordenador en la memoria eMMC del ROCK Pi (USB a eMMC). Este método lo suelen usar usuarios avanzados que estan mas familiarizados con las herramientas de línea de comandos o la modificación/personalización de código fuente y necesitan descargar estas actualizaciones a la placa para comprobar su ejecución.
Este método necesita el siguiente hardware:
- Una placa ROCK Pi 4 con alimentación
- Un ordenador con Linux/Mac/Windows
- Un cable tipo USB A a Tipo A
- Un cable USB serie a TTL (no es necesario para realizar la grabación)
- Un teclado y un ratón USB (no es necesario para realizar la grabación)
- Un monitor con conector HDMI grande (no es necesario para realizar la grabación)
- Un cable Ethernet (no es necesario para realizar la grabación)
Ve a Descargas para conseguir un Sistema Operativo
Si tu ordenador utiliza...
- Linux
Paso 1: Asegúrate que rkdeveloptool está instalado en tu ordenador
Para construir rkdeveloptool en Debian Linux, sigue las siguientes instrucciones:
Instala estos paquetes:
sudo apt-get install libudev-dev libusb-1.0-0-dev dh-autoreconf
Clona el código fuente y constrúyelo:
 git clone https://github.com/rockchip-linux/rkdeveloptool
 cd rkdeveloptool
 autoreconf -i
 ./configure
 make
Ahora tendrás el ejecutable de rkdeveloptool en el directorio actual.
sudo cp rkdeveloptool /usr/local/bin/
Paso 2: Descargas todas las imágenes necesarias
Para ROCK Pi 4, estan disponibles Android y Debian. Los nombres de las imágenes de los Sistemas Operativos especifican las palabras android y debian. Y todas las imágenes de Sistemas Operativos se marcan como xxx_gpt.img.
Paso 3: Iniciar la placa en modo maskrom
1. Inserta la memoria eMMC en el conversor eMMC a uSD. Inserta el conversor en el lector de tarjetas uSD del ordenador con Linux.
2. Usa el siguiente comando para borrar la memoria eMMC
$ sudo dd if=/dev/zero of=/dev/sdx bs=1M count=100
3. Inserta la memoria eMMC en la placa ROCK Pi 4.
4. Enciende la ROCK Pi 4.
5. Enchufa la ROCK Pi 4 a tu ordenador con Linux mediante un cable USB tipo A a tipo A. En el terminal del ordenador el comando "lsusb" debería mostrar el siguiente VID/PID si la placa esta en modo maskrom: Bus 003 Device 061: ID 2207:0011
Paso 4: Grabar la imagen flash en la memoria eMMC del ROCK Pi 4 y reiniciar
Debes seguir los siguientes pasos:
 $ rkdeveloptool db rk3399_loader_xxx.bin
 $ rkdeveloptool wl 0 xxx_gpt..img
 $ rkdeveloptool rd
Ahora reinicia.
Step1: Requisitos
This page describe how to download and install the image on an eMMC module and boot on ROCK Pi 4. You need at least the following.
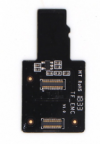
- an eMMC module, you can buy it from radxa distributor, the eMMC module from Odroid or PINE64 also works on ROCK Pi 4.
- an eMMC to microSD breakout board


- a microSD card reader, either a USB card reader or the SD card reader on laptop
- a PC/laptop running Windows or Linux or MacOS
You also need the following to run on ROCK Pi 4
- ROCK Pi 4 board with power supply
- HDMI cable for display
- USB keyboard and mouse for input
Step 2: Download necessary tools and image
- Etcher is the tool we use to write image. Download the right Etcher for your PC from Rockpi4/downloads page and install it. Check [Etcher website] for more info about Etcher.
- Choose the image you want to install from Rockpi4/downloads page and unzip it. The unzipped image name is like below:
rockpi4_debian_stretch_lxde_armhf_20181105_2120-gpt.img
We will use it for the writing.
Step 3: Write the image to microSD card
3.1 Plug and click the eMMC module to the eMMC to uSD breakout board, plug the breakout board to microSD card reader. Plug the card reader on PC.

3.2 Run the application, for example, by executing the command on Ubuntu 16.04:
$ /bin/bash etcher-etcher-electron-1.4.5-x86_64.AppImage
3.3 In the etcher window, we click button Select image.

3.4 In the etcher window, we click button Select Drive.

3.5 In the etcher window, we click button Flash.

3.6 In the etcher window, it shows us Flash Complete!

Done! Now you have successfully installed the OS image on eMMC module.