Difference between revisions of "Rockpi4/dev/spi-install"
(add link to location of maskrom button) |
RadxaYuntian (Talk | contribs) (→Write image to SPI flash from USB OTG port) |
||
| Line 8: | Line 8: | ||
=== Requirement === | === Requirement === | ||
* ROCK (Pi) 4 mainboard | * ROCK (Pi) 4 mainboard | ||
| − | ** ROCK (Pi) 4A, 4B, 4C | + | ** ROCK (Pi) 4A, 4B, 4C, and some [[Rockpi4/hardware/revision#V1.73.284A.2B.2F4B.2B.29 | older version]] of 4A+/4B+ |
| − | ** ROCK 4 SE, 4A | + | ** Latest ROCK 4 SE, 4A+, 4B+ is not supported since no SPI Flash on the board |
* Power adapter | * Power adapter | ||
* '''USB Male A to Male A cable'''(important) USB-C has been seen as not working, an adaptor for USB-C to USB-A has worked. [https://forum.radxa.com/t/otg-flashing-not-working/717 See discussion]. | * '''USB Male A to Male A cable'''(important) USB-C has been seen as not working, an adaptor for USB-C to USB-A has worked. [https://forum.radxa.com/t/otg-flashing-not-working/717 See discussion]. | ||
Revision as of 03:27, 13 April 2023
ROCK Pi 4 > Development > Write image to SPI flash from USB OTG port
Contents
Write image to SPI flash from USB OTG port
ROCK Pi 4 supports Maskrom mode, which is a special operation mode for CPU to wait for USB OTG port command. The Linux/macOS PC tool we use to communicate with ROCK Pi 4 in Maskrom mode are the rkdeveloptool and RKDevTool. We use tool rkdeveloptool in Linux/macOS and RKDevTool tool under Windows.
Requirement
- ROCK (Pi) 4 mainboard
- ROCK (Pi) 4A, 4B, 4C, and some older version of 4A+/4B+
- Latest ROCK 4 SE, 4A+, 4B+ is not supported since no SPI Flash on the board
- Power adapter
- USB Male A to Male A cable(important) USB-C has been seen as not working, an adaptor for USB-C to USB-A has worked. See discussion.
Install Tools&Drivers
Please check this guide, Install rockchip flash tools, rkdeveloptool/RKDevTool, under Windows/Linux/MacOS PC.
Boot the board to maskrom mode
Case 1: Empty SPI flash
To boot ROCK Pi 4 into maskrom mode is simple, you don't need to press any key
- Power off the board and remove any bootable storage media, remove microSD card, remove eMMC module.
- Plug the USB Male A to Male A cable to ROCK Pi 4 OTG port (the upper USB3 port), the other side to PC
- Power on the board
Case 2: Update SPI flash with bootloader inside
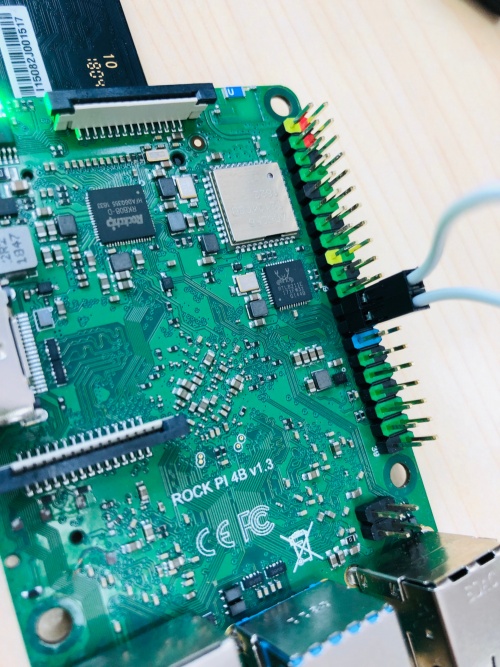
If the SPI flash already contains a bootable bootloader, you need to disable the SPI flash at boot time by shortcut the SPI1_CLK to GND. Use wire to connect PIN 23 and 25. Checkout the Pinout.
Shown as following:
- Use cable to connect PIN23 and PIN25
- Power off the board
- Remove any bootable storage media microSD card
- Remove/Disable eMMC module
- In case of eMMC is not on board: Remove eMMC module
- In case of eMMC is on board: Press and hold the Maskrom button to disable eMMC (Location of the button is described here)
- Plug the USB Male A to Male A cable to ROCK Pi 4 OTG port (the upper USB3 port), the other side to PC
- Power on the board
- Release Maskrom button only when eMMC is on board
- Remove the cable and disconnect PIN23 and PIN25
Now on your Linux PC, lsusb command show show the following usb devices
Bus 003 Device 005: ID 2207:330c
It means the device is in maskrom mode now.
- Now we can proceed the next step to flash.
Step 3: Write to SPI flash via USB
On your PC, run the rkdeveloptool
   rkdeveloptool ld        # List the device
   DevNo=1	Vid=0x2207,Pid=0x330c,LocationID=305	Maskrom
Download the SPI loader (flash helper, important) to init the ram and prepare the flashing environment etc. If you don't have it, you can download it from here downlad the rk3399_loader_spinor_v1.15.114.bin
According to this thread boards with v1.72 like the Rock 4C Plus require v1.20.126 of the SPI loader.bin, that can be found in this git repo.
sudo rkdeveloptool db /path/to/rk3399_loader_spinor_v1.15.114.bin # will output: Downloading bootloader succeeded.
Write the packed SPI image of u-boot and trust.img, start to write from offset 0. If you don't have it, you can download it from here download the SPI Bootloader image.
The latest version is 2017.09-2697-ge41695afe3_20201219.
- For ROCK Pi 4A
sudo rkdeveloptool wl 0 /path/to/rockpi4a-uboot-trust-spi_2017.09-2697-ge41695afe3_20201219.img # will output: Write LBA from file (100%)
- For ROCK Pi 4B
sudo rkdeveloptool wl 0 /path/to/rockpi4b-uboot-trust-spi_2017.09-2697-ge41695afe3_20201219.img # will output: Write LBA from file (100%)
- For ROCK Pi 4C
sudo rkdeveloptool wl 0 /path/to/rockpi4c-uboot-trust-spi_2017.09-2697-ge41695afe3_20201219.img # will output: Write LBA from file (100%)
Notes that writing SPI Bootloader image will take at least 15 seconds. If it goes fast, less than 3 seconds, there is something wrong with SPI Flash. Maybe need to change the SPI Flash.
Reboot the device
sudo rkdeveloptool rd # will output: Reset Device OK.
Now the device should boot from the SPI flash now.
FAQs
Erase SPI flash on Windows PC
When ROCK (Pi) 4 is in Maskrom, before flashing, please make sure that PIN23 and PIN25 on 40-PIN header is not connected.
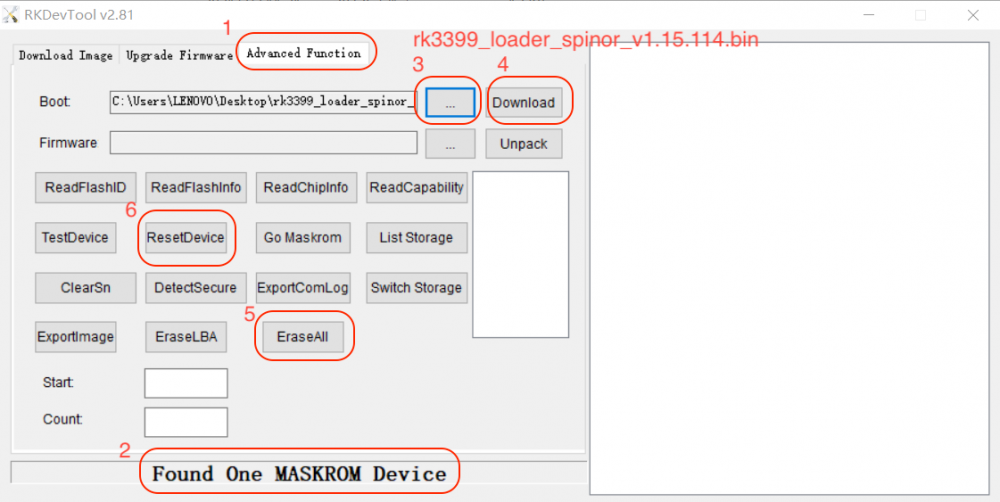
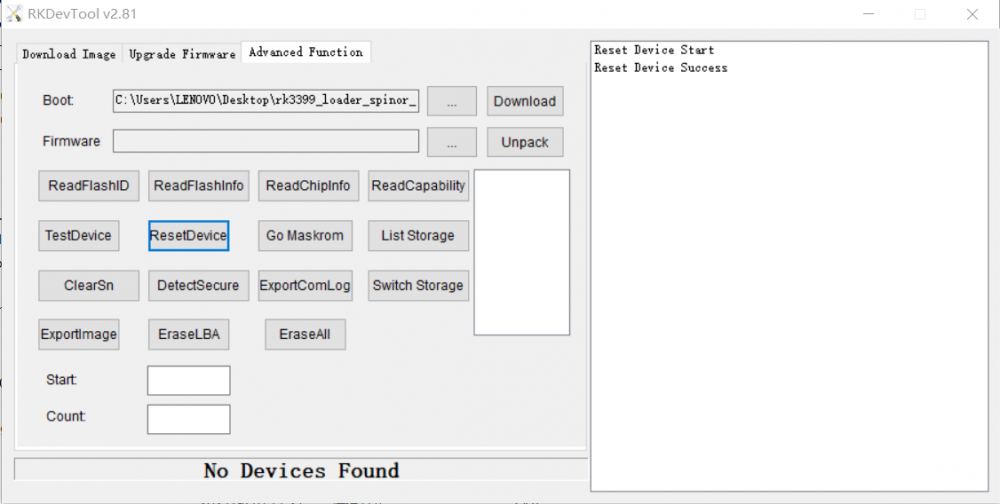
Double click the RKDevTool.exe and click button "Advanced Function" to get into Advanced Function window.
Step 1: Confirm "Found One Maskrom Device"
If your ROCK (Pi) 4 is in Maskrom mode and connects to PC, you can see that RKDevTool shows Found one MASKROM Device.
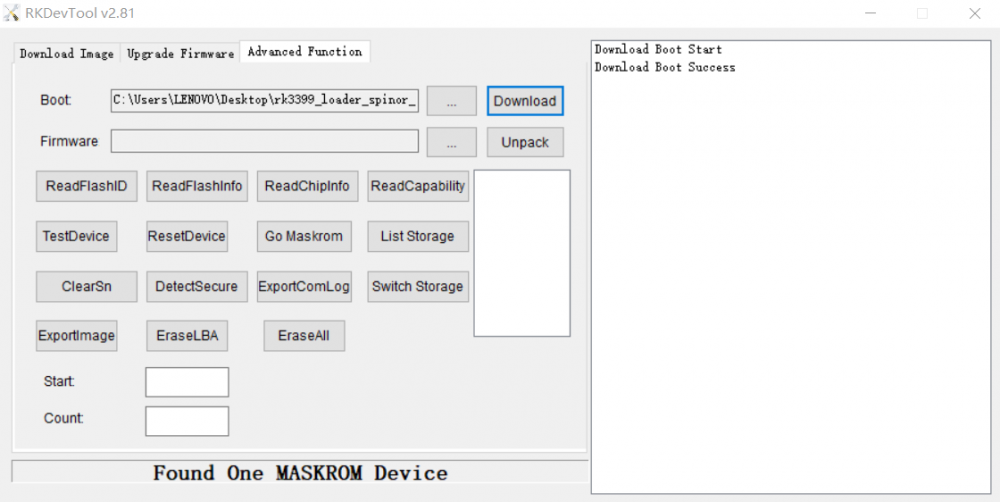
Step 2: Download RK3399 Loader
Choose loader rk3399_loader_spinor_v1.15.114.bin and download it.
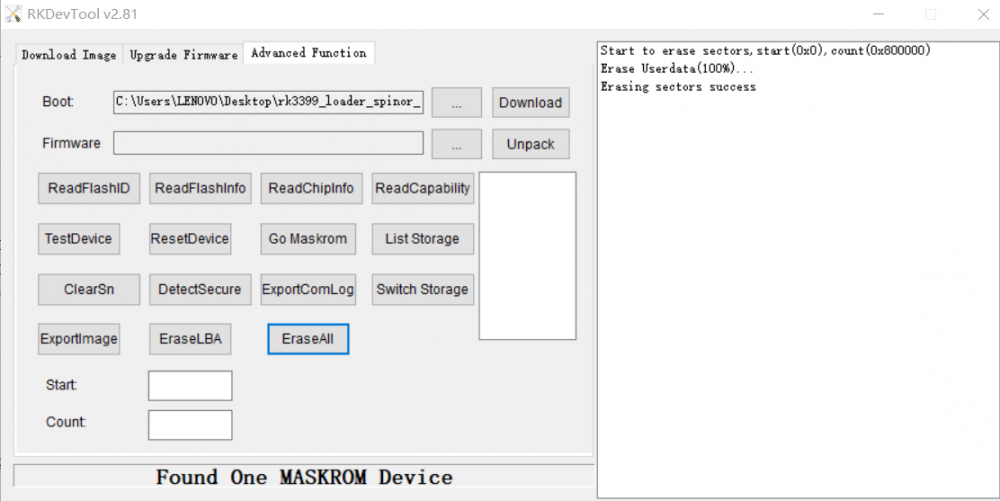
Step 3: Erase device
Click button "EraseAll" to erase device.
Step 4: Reset device
Click button "ResetDevice" to reset device.
Erasing job is done.
Erase images on SPI flash on Linux/macOS PC
To erase images on SPI device, it's the same as writing the image to SPI flash, just the image we write is empty.
Firstly, follow Step 1 and Step 2: Boot the board to maskrom mode, Case 2: Update SPI flash with bootloader inside above to boot ROCK (Pi) 4 to maskrom mode.
Secondly, on your Linux PC, create zero.img.
dd if=/dev/zero of=./zero.img bs=1M count=4
Thirdly, flash zero.img to SPI device.
   rkdeveloptool db rk3399_loader_spinor_v1.15.114.bin
   rkdeveloptool wl 0 zero.img
   rkdeveloptool rd    # will output: Reset Device OK.
Finally, on your Linux PC, lsusb command show show the following usb devices
Bus 003 Device 005: ID 2207:330c
It means the SPI image is erased successfully.
Erase images on SPI flash on ROCK (Pi) 4
If you could boot into Linux and you have /dev/mtd* device available, you can use the following to erase the SPI flash.
- For ROCK (Pi) 4A
sudo /usr/local/sbin/rockpi4a_erase_spi_flash.sh #related package: rockpi4a-rk-u-boot-latest
- For ROCK (Pi) 4B
sudo /usr/local/sbin/rockpi4b_erase_spi_flash.sh #related package: rockpi4b-rk-u-boot-latest
- For ROCK (Pi) 4C
sudo /usr/local/sbin/rockpi4c_erase_spi_flash.sh #related package: rockpi4c-rk-u-boot-latest
Troubleshooting
- If you have issue with flashing via USB OTG, start a new post on the forum. https://forum.radxa.com/c/dev

