Difference between revisions of "RockpiS/getting started"
(→Option 1: USB access(adb)) |
|||
| Line 177: | Line 177: | ||
== WIFI Connection == | == WIFI Connection == | ||
| − | + | Check [[rockpiS/Debian#WIFI Connection| WIFI Connection]]. | |
| − | === | + | == Bluetooth == |
| − | + | ||
| − | + | ||
| − | + | Check [[rockpiS/Debian#Bluetooth| Bluetooth]]. | |
| − | + | ||
| − | + | ||
| − | + | ||
| − | + | ||
| − | + | ||
| − | + | ||
| − | + | ||
| − | + | ||
| − | + | ||
==Buttons== | ==Buttons== | ||
Revision as of 03:50, 5 November 2019
ROCK Pi S > Getting started
Contents
[hide]This guide is designed for ROCK Pi S enthusiast. The purpose is to learn about the ROCK Pi S board as well as how to prepare and set up for basic use. We will introduce the board information as much as possible.
What you need
Necessary
- ROCK Pi S main board
- One of the Storage media below:
- μSD card, larger than 8GB.
- USB type C to type A cable
- For both power and USB communication(adb/fastboot) with HOST PC.
- PC/Laptop which has USB ports
- The ROCK Pi S can be powered from the PC/Laptop USB ports directly
Optional
- μSD Card Reader
- For flashing the image into μSD Card or eMMC Module.
- USB to TTL serial cable
- For serial console, low level troubleshooting, development etc.
- Ethernet cable
- ROCK Pi S supports Internet access via WIFI or Ethernet.
- An Ethernet cable is used to connect your ROCK Pi S to a local network and the Internet.
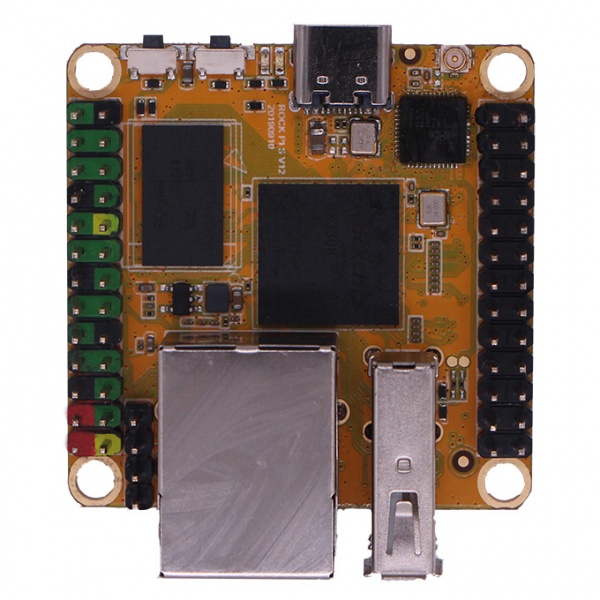
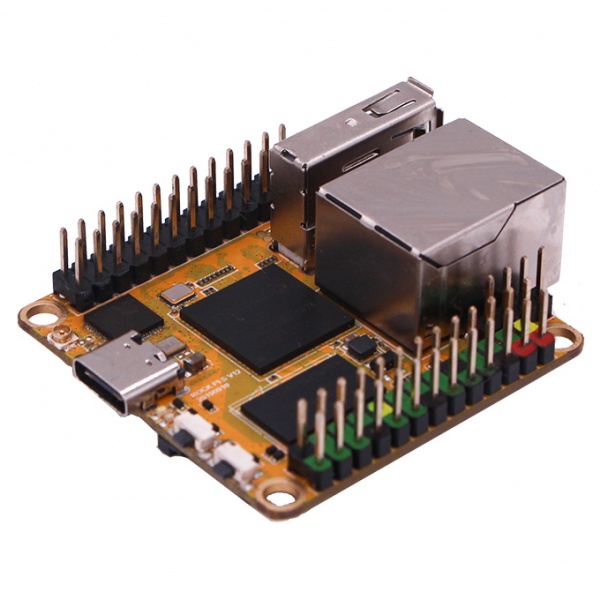
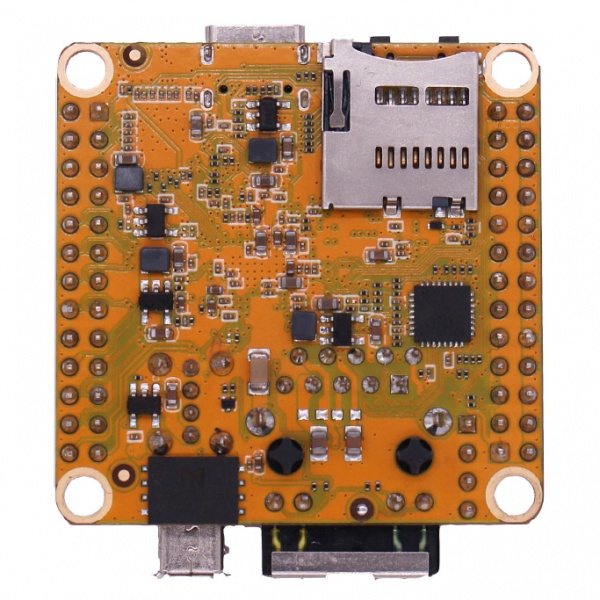
Close look of ROCK Pi S
- ROCK Pi S front view
- ROCK Pi S front with an angle view
- ROCK Pi S back view
Features
| Model | ROCK Pi S | |
|---|---|---|
| Processor | SoC RK3308 Quad Cortex-A35 ARM 64bits processor frequency up to 1.3GHz | |
| Memory | 256MB or 512MB DDR3 | |
| Storage | MicroSD(TF), optional on board 1/2/4/8Gb NAND flash | |
| Wireless | 802.11 b/g/n wifi Bluetooth 4.0(rtl8723DS) external antenna | |
| USB | USB2.0 Type-A HOST x1 USB3.0 Type-C OTG x1 | |
| Key | maskrom x1 reset x1 | |
| Ethernet | 100MB ethernet, optional PoE(additional HAT requried) | |
| IO | 26-pin expansion header I2C x4 PWM x3 SPI x2 UART x3 I2S0 x1 5V DC power in x2 3.3V DC power in x2 | |
| Others | --- | |
| Power | USB Type-C DC 5V | |
| Size | 1.7inch square | |
Starting the board for the first time
ROCK Pi S can be started with μSD Card.
1. Prepare the image
- When start system with μSD Card
Insert the μSD Card into μSD Card Reader, which connects to host computer.
2. Write Image to uSD card
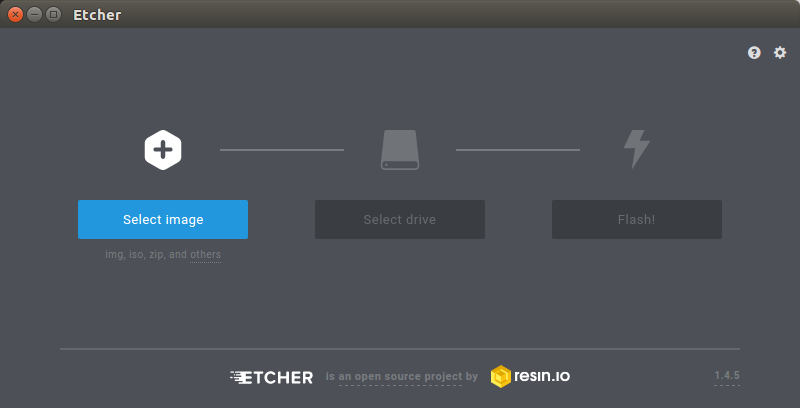
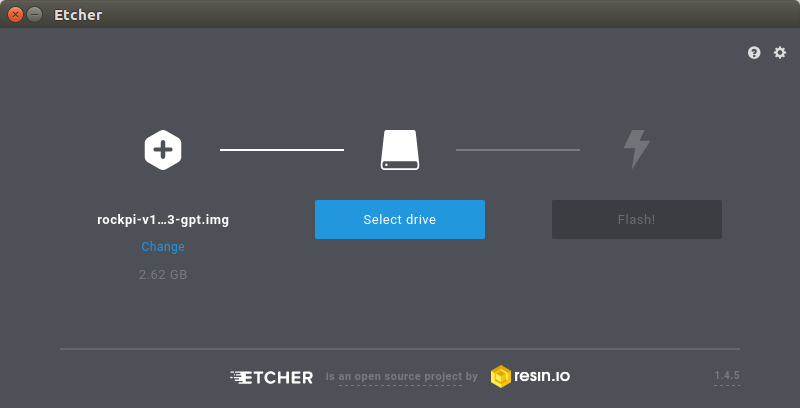
- Download the flash tool, etcher, from Downloads. Choose the right version for your host operation system. Here we operate on host Ubuntu 16.04.
- After unpacking the package, we run the tool by executing the command
$ ./etcher-etcher-electron-1.4.5-x86_64.AppImage
If you get an error message: "No polkit authentication agent found" you can try and start it with sudo, but do know that this is running the tool as root.
- In the etcher window, click Select image.
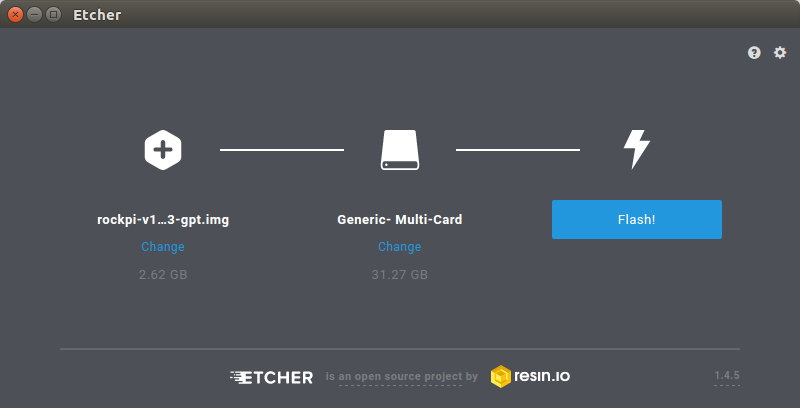
- In the etcher window, click Select Drive.
- In the etcher window, click Flash.
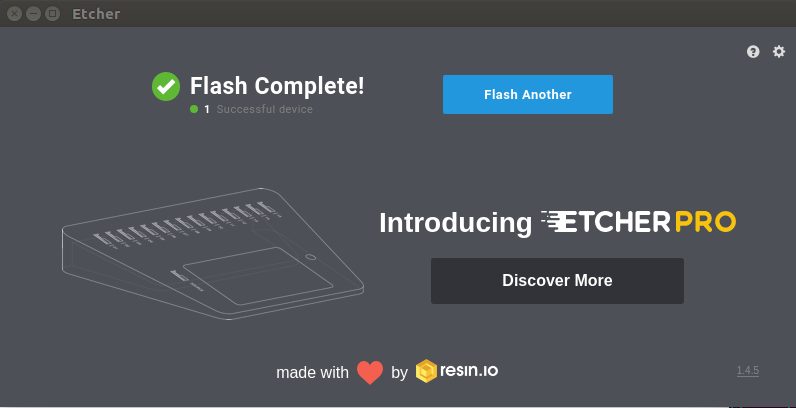
- In the etcher window, once it shows us Flash Complete! It is done and can be put into the ROCK Pi S.
3. Boot the board
- Now insert the uSD card to the board.
- Use a USB C to USB A cable, connect the board to your PC
- ROCK Pi S will boot, the green power led is on, and after a while, the blue led start blinking
- (Optional)Use a USB to TTL serial cable to make a connection between your PC and ROCK Pi S. See Serial Console
4. Access from the Host PC/Laptop
Option 1: USB access(adb)
By default, the ROCK Pi S Linux image enables adbd services, which is a debug bridge from Android now ported on Linux. With one USB A to C cable you can power and access the board, very handy.
To use adb, you need to install adb tool on the PC/Laptop. Check instructions for Windows and Linux.
After you have adb installed successfully, run the following command on console to login the shell of ROCK Pi S:
adb shell
Check Using adb.
Option 2: Serial console
Check Serial Console
Option 3: SSH
SSH server is enabled on port 22 of ROCK Pi S default image.
To access ROCK Pi S by SSH, try
 ping ip-of-device
 ssh rock@ip-of-device
or if your router/network support Local Domain
 ping rockpis.local
 ssh rock@rockpis.local
Note: You can get the IP of ROCK Pi S from option 1 or option 2.
Troubleshooting
- Refer Troubleshooting page
- Post your issue on the forum: https://forum.radxa.com/c/rockpiS
Network state
- Look at network configure:
$ sudo ifconfig
- Test network:
$ ping -c 5 www.google.com
WIFI Connection
Check WIFI Connection.
Bluetooth
Check Bluetooth.
Buttons
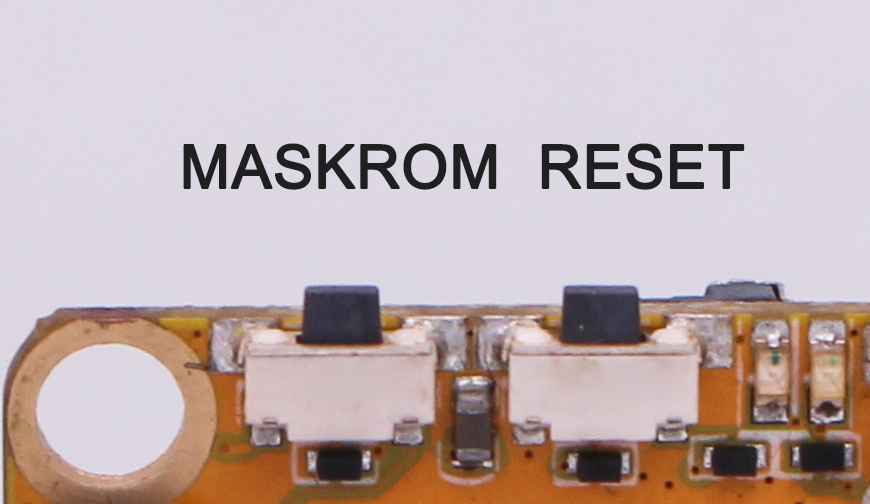
ROCK Pi S have reset key and maskrom key:
- Reset key:
Push this key ROCK Pi S can reset hardware.
- Maskrom key:
ROCK Pi S support boot on SD NAND flash,SD NAND was booting before TF card on default,push maskrom key can ignore the SD NAND flash.
GPIO
ROCK Pi S has two 26-pin expansion header. Each pin is distinguished by color, more information click here
Development for GPIO ROCK Pi S support libmraa GPIO library, click here to get more information.
Using OTG
ROCK Pi S has an USB type-C OTG connector, you can using it write or read data by PC to ROCK Pi S, more help click here

