Difference between revisions of "RockpiN10/dev/usb-install-for-android-image"
| (7 intermediate revisions by 2 users not shown) | |||
| Line 1: | Line 1: | ||
{{rockpiN10_header}} | {{rockpiN10_header}} | ||
| + | {{Languages|rockpiN10/dev/usb-install-for-android-image}} | ||
==Requirements == | ==Requirements == | ||
| Line 5: | Line 6: | ||
This page describe how to download and install the rkupdate image on an eMMC module and boot on ROCK Pi N10. You need at least the following. | This page describe how to download and install the rkupdate image on an eMMC module and boot on ROCK Pi N10. You need at least the following. | ||
| − | * The EMMC module has been welded to the | + | * The EMMC module has been welded to the Rock PI N10, which is in this position |
[[File:Rockpi_N10_EMMC_module.jpg | 300px]] | [[File:Rockpi_N10_EMMC_module.jpg | 300px]] | ||
* an USB Male A to USB Male A cable | * an USB Male A to USB Male A cable | ||
| Line 20: | Line 21: | ||
== Boot To Maskrom Mode == | == Boot To Maskrom Mode == | ||
To boot ROCK Pi N10 into maskrom mode is simple since we have the maskrom key on board. | To boot ROCK Pi N10 into maskrom mode is simple since we have the maskrom key on board. | ||
| − | * Power off the board and '''remove any bootable storage media''' such as microSD card. If you have bootloader in SPI flash, you need to shortcut SPI flash first as picture below. Or you can erase SPI | + | * Power off the board and '''remove any bootable storage media''' such as microSD card. If you have bootloader in SPI flash, you need to shortcut SPI flash first as picture below. Or you can erase SPI flash at first. |
[[File:Rockpin10_spi_shortcut.jpeg | 300px ]](click to view large image) | [[File:Rockpin10_spi_shortcut.jpeg | 300px ]](click to view large image) | ||
| Line 38: | Line 39: | ||
Bus 003 Device 005: ID 2207:330c | Bus 003 Device 005: ID 2207:330c | ||
| + | |||
| + | Or open device manager in your Windows PC, and the following devices will be displayed<br/> | ||
| + | [[File:Device_Manager_maskromUSBDevice.PNG | 400px]](click to view large image) | ||
It means the device is in '''maskrom mode''' now. | It means the device is in '''maskrom mode''' now. | ||
| − | == | + | == Flash Image == |
| + | ==== Linux user follow here: ==== | ||
1. Use upgrade_tool on Linux. [[ Android/upgrage_tool | Configuration upgrade_tool. ]] | 1. Use upgrade_tool on Linux. [[ Android/upgrage_tool | Configuration upgrade_tool. ]] | ||
| − | < | + | <pre> |
radxa$ upgrade_tool uf update.img | radxa$ upgrade_tool uf update.img | ||
| − | </ | + | </pre> |
| − | + | ||
| − | + | ||
| + | ==== Windows user follow here: ==== | ||
| + | 1. Use AndroidTool on Windows. [[ Android/android_tool | Using AndroidTool. ]] | ||
Latest revision as of 02:19, 26 April 2020
Contents
Requirements
This page describe how to download and install the rkupdate image on an eMMC module and boot on ROCK Pi N10. You need at least the following.
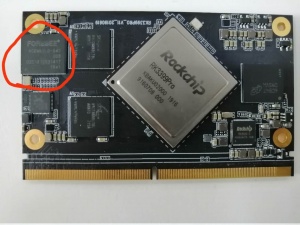
- The EMMC module has been welded to the Rock PI N10, which is in this position
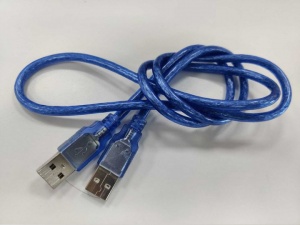
- an USB Male A to USB Male A cable
- a PC/laptop running Windows or Linux or MacOS
You also need the following to run on ROCK Pi N10
- ROCK Pi N10 board with power supply
- HDMI cable for display
- USB keyboard and mouse for input
Boot To Maskrom Mode
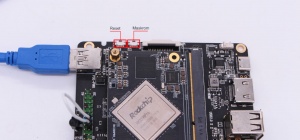
To boot ROCK Pi N10 into maskrom mode is simple since we have the maskrom key on board.
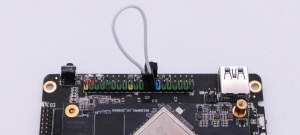
- Power off the board and remove any bootable storage media such as microSD card. If you have bootloader in SPI flash, you need to shortcut SPI flash first as picture below. Or you can erase SPI flash at first.
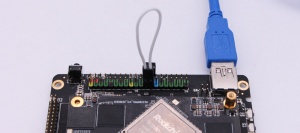
- Plug the USB Male A to Mail A cable to ROCK Pi N10 OTG port(the front USB3 port), the other side to PC
- Power on the board
- Press and hold the maskrom key, short press the reset key
- Release the maskrom key
Now on your Linux PC, lsusb command show show the following usb devices
Bus 003 Device 005: ID 2207:330c
Or open device manager in your Windows PC, and the following devices will be displayed
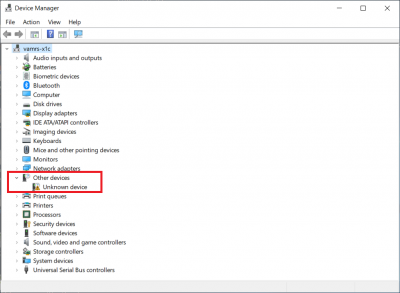
It means the device is in maskrom mode now.
Flash Image
Linux user follow here:
1. Use upgrade_tool on Linux. Configuration upgrade_tool.
radxa$ upgrade_tool uf update.img
Windows user follow here:
1. Use AndroidTool on Windows. Using AndroidTool.

