Difference between revisions of "Rockpi4/dev/usb-install"
(→Boot the board to maskrom mode) |
(→Boot the board to maskrom mode) |
||
| Line 27: | Line 27: | ||
* 1. Power off the board | * 1. Power off the board | ||
| − | * 2. Short-circuit SPI Nor Flash if there is | + | * 2. Short-circuit SPI Nor Flash if there is one SPI Nor Flash on board. |
[[File:Spi_clk_gnd.jpg | 200px]] | [[File:Spi_clk_gnd.jpg | 200px]] | ||
Revision as of 07:09, 15 January 2022
ROCK Pi 4 > Development > Install image to eMMC from USB OTG port
Contents
Install image to eMMC from USB OTG port
ROCK Pi 4 supports Maskrom mode, which is a special operation mode for CPU to wait for USB OTG port command. The Linux/macOS PC tool we use to communicate with ROCK Pi 4 in Maskrom mode are the rkdeveloptool and RKDevTool. We use tool rkdeveloptool in Linux/macOS and RKDevTool tool under Windows.
Requirement
- ROCK Pi 4 mainboard
- ROCK Pi 4A
- ROCK Pi 4A Plus
- ROCK Pi 4B
- ROCK Pi 4B Plus
- ROCK Pi 4C
- eMMC on board or eMMC module
- Power adapter
- USB Male A to Male A cable(important) USB C to USB A cable does not working on all PCs. See discussion.
Install Tools&Drivers
Please check this guide, Install rockchip flash tools, rkdeveloptool/RKDevTool, under Windows/Linux/MacOS PC.
Boot the board to maskrom mode
To boot ROCK Pi 4 into maskrom mode is simple:
- 1. Power off the board
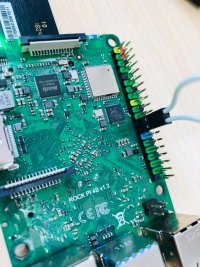
- 2. Short-circuit SPI Nor Flash if there is one SPI Nor Flash on board.
- 3. Remove microSD card
- 4. Insert removable eMMC module ( Skip this when there in one eMMC on board)
- 5. Plug the USB Male A to Male A cable to ROCK Pi 4 OTG port(the upper USB3 port), the other side to PC
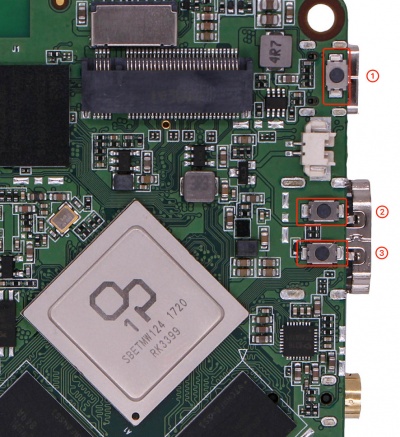
- 6. Press and hold the Maskrom key if your board is Plus version with soldered eMMC (1: Reset 2: Maskrom 3: Recovery)
- 7. Power on the board and release the maskrom key(important)
- 8. Confirm that ROCK Pi 4 is in Maskrom mode .
- For macOS host: lsusb result: Bus 000 Device 004: ID 2207:330c Fuzhou Rockchip Electronics Co., Ltd. Composite Device
- For Linux host: lsusb result: Bus 001 Device 112: ID 2207:330c Fuzhou Rockchip Electronics Company
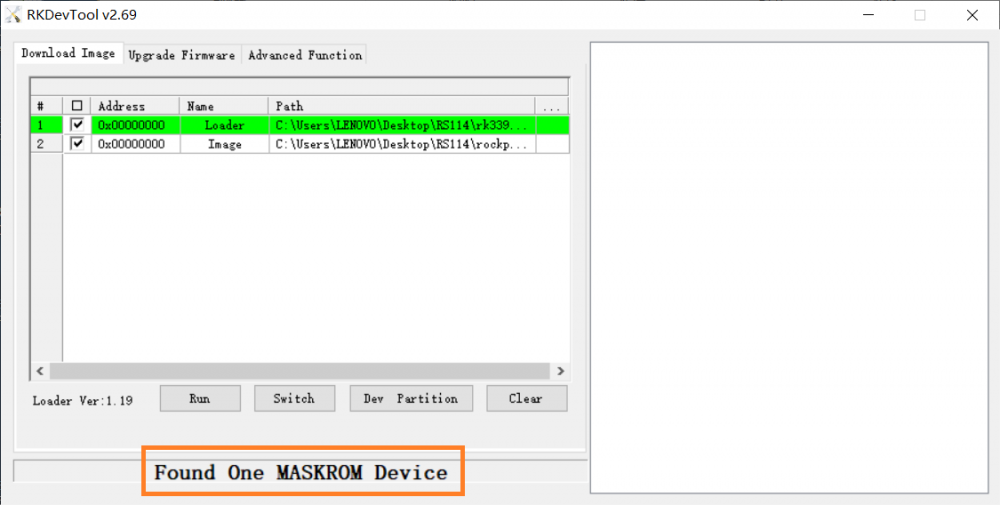
- For Windows host: Open RKDevTool and you would see the device is in Found One MASKROM Device.
Alternatively, if you are running Android and can access ADB, you can reboot the device to loader mode `adb reboot bootloader` then use the rkdeveloptool to reset the device into maskrom mode `rkdeveloptool rd 3` or Windows AndroidTool Switch button to go to maskrom mode.
Begin Installation USB -> eMMC
Linux/macOS
On your PC, run the rkdeveloptool
   rkdeveloptool ld        # List the device
   DevNo=1	Vid=0x2207,Pid=0x330c,LocationID=305	Maskrom
Download the loader (flash helper) to init the ram and prepare the flashing environment etc. If you don't have it, you can download it from here
rkdeveloptool db rk3399_loader_vxxxx.bin
Write the GPT image to eMMC, start to write from offset 0.
rkdeveloptool wl 0 /path/to/rockpi4b-xxx-gpt.img
Reboot the device
rkdeveloptool rd
Now the device should boot the new image on eMMC
Please notice that when you want to erase eMMC on board, you can use this command. Get zero.img from here.
   rkdeveloptool db rk3399_loader_vxxxx.bin
   rkdeveloptool wl 0 zero.img
Windows
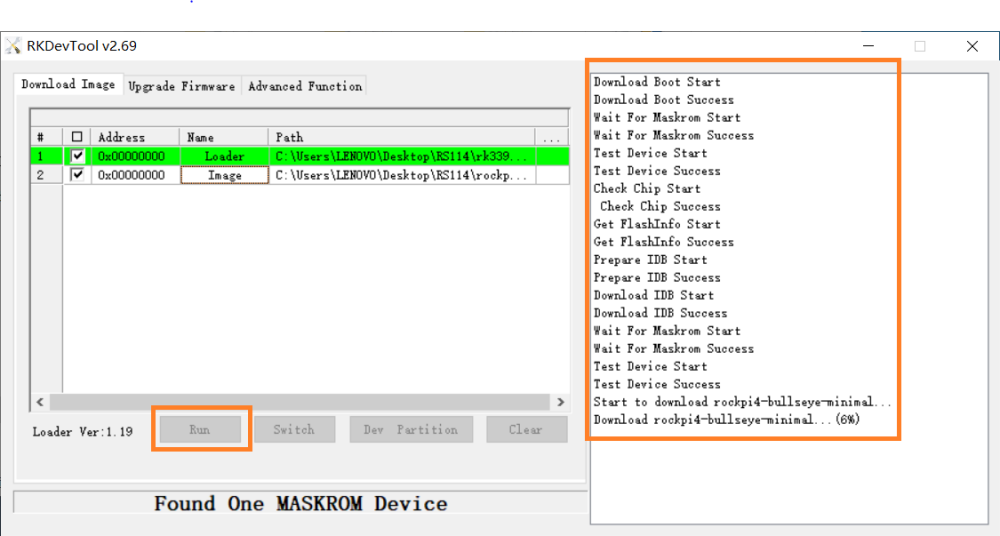
Double click the RKDevTool.exe and you will see the following interface: If your ROCK Pi 4 is in maskrom mode and connects to PC, you can see that the program detect it, as the red box shown below:
Step 1: Select Loader
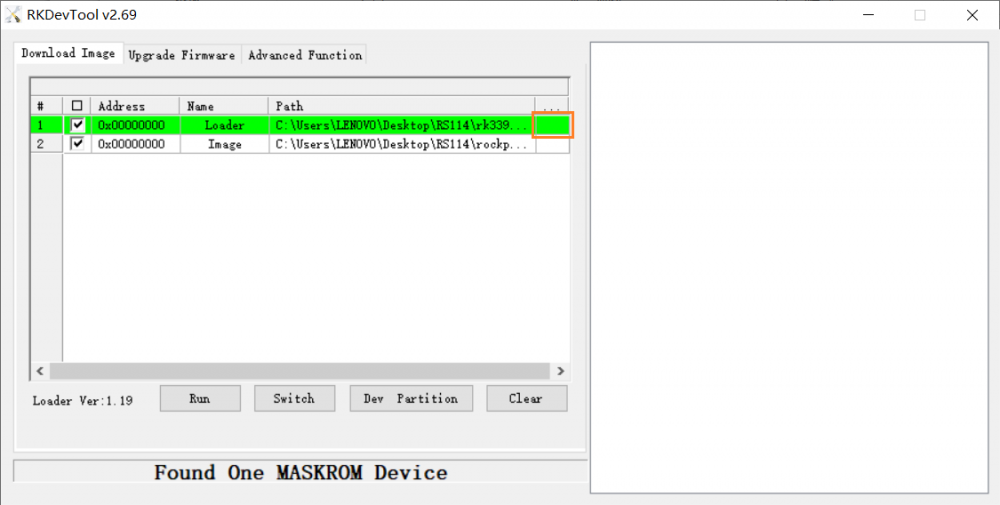
Next, click the button in the red box on the right last columns select the loader "rk3399_ loader_ xxxxx.bin ",
Note: the loader (flash helper) is used to init the ram and prepare the flashing environment etc. If you don't have it, you can download it from here
Step 2: Select Image
Then click the right last columns to in the Image row and choose the image you want to flash.
Note: Normally the image name should ends with xxx-gpt.img. If the image name ends with xxx-rkupdate.img, you can not flash with this method.
Step 3: Run
Finally, click the "run" button in the red box below, and you will see the content in the red box on the right. When the progress reaches 100%, the download is completed.
Install by partitions(Advanced)
Linux/macOS
Sometimes we only want to update a partition of the image, for example only the boot partition to update kernel only. We can flash by partitions
| Part Number | Offset | Name    | Description                |
| ----------- | ------ | ------- | -------------------------- |
| 1           | 32KB   | loader1 | First stage loader         |
| 2           | 8MB    | loader2 | U-boot image               |
| 3           | 12MB   | trust   | ATF                        |
| 4           | 16MB   | boot    | Kernel partition, bootable |
| 5           | 128MB  | rootfs  | Rootfs                     |
When the board is in maskrom mode, flash the partitions with the following command and offset:
   rkdeveloptool db rk3399_loader_*.bin
   rkdeveloptool wl 64 idbloader.img
   rkdeveloptool wl 16384 uboot.img
   rkdeveloptool wl 24576 trust.img
   rkdeveloptool wl 32768 boot.img
   rkdeveloptool wl 262144 rootfs.img
Windows
TBD.
FAQ
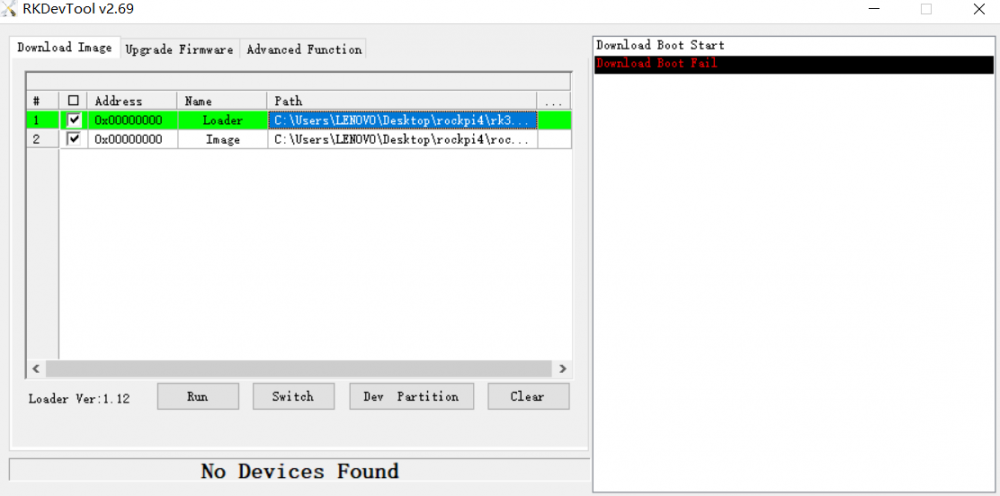
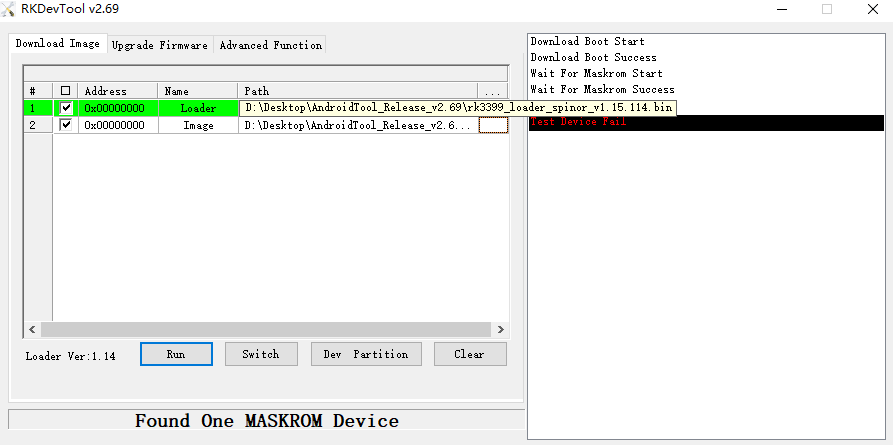
If you meet such these situations, you can try to change the bin file by rk3399_loader_v1.20.119.bin
Troubleshooting
- If you have issue with flashing via USB OTG, start a new post on the forum. https://forum.radxa.com/c/dev

