Difference between revisions of "Rock/Serial debug tools Setting"
(→Connect the cable) |
|||
| (One intermediate revision by the same user not shown) | |||
| Line 8: | Line 8: | ||
== Requirement == | == Requirement == | ||
* Radxa Rock mainboard | * Radxa Rock mainboard | ||
| − | * TTL to USB serial cable | + | * [http://store.radxa.com/collections/frontpage/products/usb-serial-cable-for-radxa TTL to USB serial cable] |
* PC/Desktop running Windows/Linux/Mac OS | * PC/Desktop running Windows/Linux/Mac OS | ||
| Line 16: | Line 16: | ||
RX -> Green | RX -> Green | ||
TX -> White | TX -> White | ||
| − | GND -> Black | + | GND -> Black |
<span style="color:red"> '''Warning: Don't connect the RED one, it will damage the board. I suggest cut the RED line off.''' </span> | <span style="color:red"> '''Warning: Don't connect the RED one, it will damage the board. I suggest cut the RED line off.''' </span> | ||
Latest revision as of 11:39, 13 January 2015
Contents
[hide]This page describe how to set up and debug the radxa rock board via serial console.
Requirement
- Radxa Rock mainboard
- TTL to USB serial cable
- PC/Desktop running Windows/Linux/Mac OS
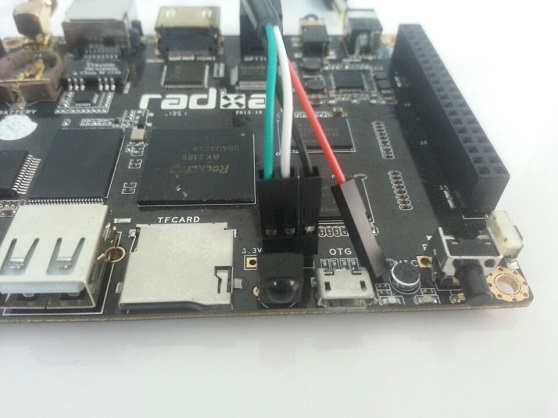
Connect the cable
Board    TTL2USB Cable
RX    ->  Green
TX    ->  White
GND   ->  Black
Warning: Don't connect the RED one, it will damage the board. I suggest cut the RED line off.
Set up on the PC
Windows
Here we use putty as an example to show us how to set the serial debug tools.
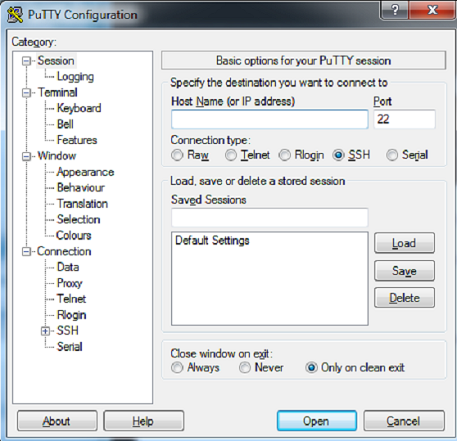
Double click the Putty.exe, you will see the interface like:
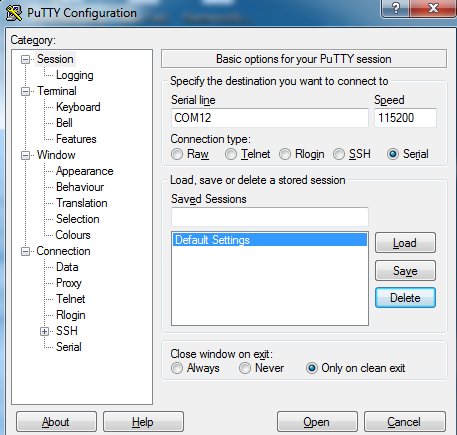
Select the Serial, Fill the Serial line with the right serial port,and the Speed with 115200
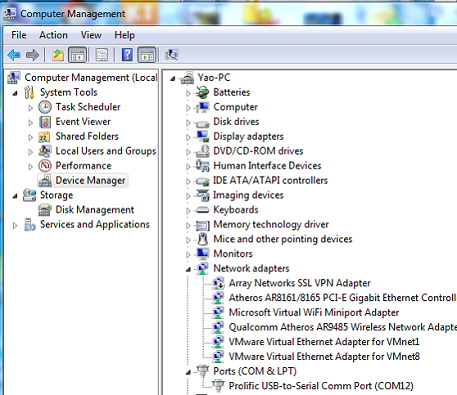
You can get the serial port here:
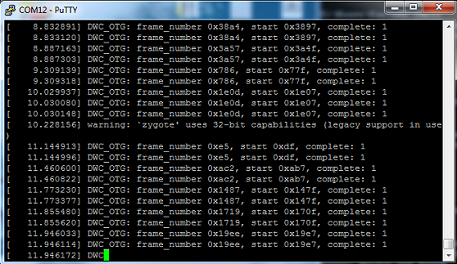
Finish setting , Click Open the putty will work
Linux
For connecting UART/Serial console on Linux, the picocom utility is very handy to use in a Terminal session. You can also use PuTTY for this purpose.
picocom
If you are using Ubuntu, you need to add the current user into group dialout, then close your session and relogin to make changes effective immediately:
 sudo adduser $USER dialout
 gnome-session-quit
Install picocom:
sudo apt-get install picocom
Open connection to serial line, using 115200 bauds:
picocom /dev/ttyUSB0 -b 115200 -e w
Note: Escape character is set to 'w', you have to press Ctrl-w Ctrl-x to quit.
PuTTY
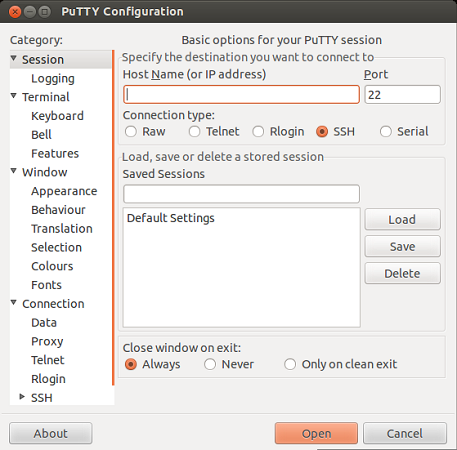
Here we still use PuTTY as an example. when start PuTTY firstly you will see this interface:
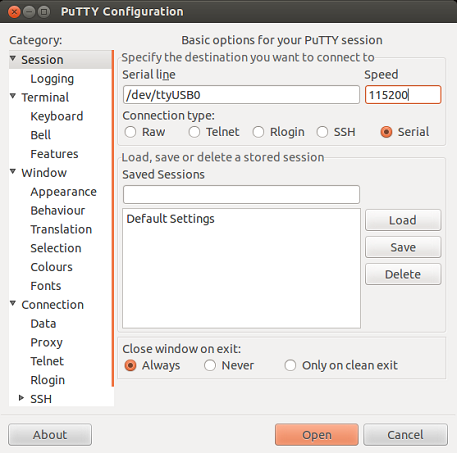
Select the Serial, Fill the Serial line with the right serial port,and the Speed with 115200
How to get the serial port .First cat /proc/tty/drivers, to make sure is there driver support(radxa board is connected with pc via USB so the device name should be usbserial)
Here we find the line
usbserial /dev/ttyUSB 188 0-253 serial
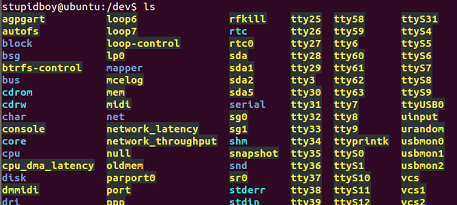
which tell us the driver is ok, then cd /dev/ to confirm whether is there device named ttyUSB* . you can unplug and then plug the usb to get the right device.
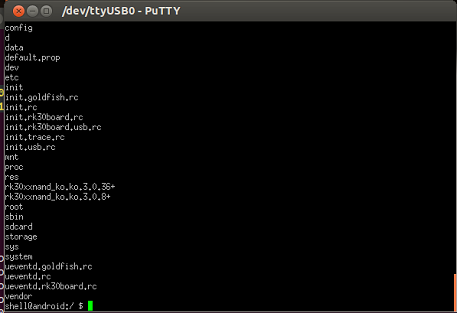
Finish setting, Click Open the putty will work!
Note:
1、Under Ubuntu If you got the following error – “Unable to open connection to: Unable to open serial port“. To fix it, add the current user to the “dialout” user group , logout and login to take effect, detail:
http://jesin.tk/fix-serial-port-permission-denied-errors-linux/
Mac OS X
- You need to buy a USB to TTL Serial Cable and install the PL2303 Mac OS X Driver from Prolific Technology.
You will have to reboot after installing the drivers. - Connect Black line on GND, White line on TX and Green line on RX.
- Use Homebrew package manager to install picocom, then use picocom to dialog with Debug UART/Serial Console.
   brew install picocom
   picocom /dev/tty.usbserial -b 115200 -e w
Note: Type Ctrl-w Ctrl-x to exit session.

