Difference between revisions of "Zero/install/eMMC erase"
RadxaYuntian (Talk | contribs) |
RadxaYuntian (Talk | contribs) |
||
| (9 intermediate revisions by 2 users not shown) | |||
| Line 1: | Line 1: | ||
{{zero_header}} | {{zero_header}} | ||
{{Languages|zero/install/eMMC_erase}} | {{Languages|zero/install/eMMC_erase}} | ||
| − | [[zero | Radxa Zero]] > [[zero/install | Installation]] > [[zero/install/eMMC_erase | Erase eMMC | + | [[zero | Radxa Zero]] > [[zero/install | Installation]] > [[zero/install/eMMC_erase | Erase eMMC]] |
| − | === How to erase | + | === How to erase eMMC === |
| − | This guide describes how to erase | + | This guide describes how to erase Radxa Zero series eMMC for installing a new system. Beware that this is not a secure erase, and only the bootloader and the partition header are wiped. |
| + | |||
| + | For more detailed guide on wiping eMMC (or if this fails), please refer to [[Zero/install/Boot_Troubleshooting | Boot Troubleshooting]] page. | ||
== Requirement == | == Requirement == | ||
| − | * Radxa Zero | + | * Radxa Zero or Radxa Zero 2 |
* A PC/laptop running Windows, Linux, or macOS | * A PC/laptop running Windows, Linux, or macOS | ||
* USB A to C cable or C to C cable, depending on your host | * USB A to C cable or C to C cable, depending on your host | ||
| − | == | + | == How to == |
| − | + | Follow [[Zero/dev/maskrom#Enable_maskrom | maskrom guide]] to setup and load [https://dl.radxa.com/zero/images/loader/radxa-zero-erase-emmc.bin radxa-zero-erase-emmc.bin] or [https://dl.radxa.com/zero2pro/images/loader/radxa-zero-2pro-erase-emmc.bin radxa-zero-2pro-erase-emmc.bin]: | |
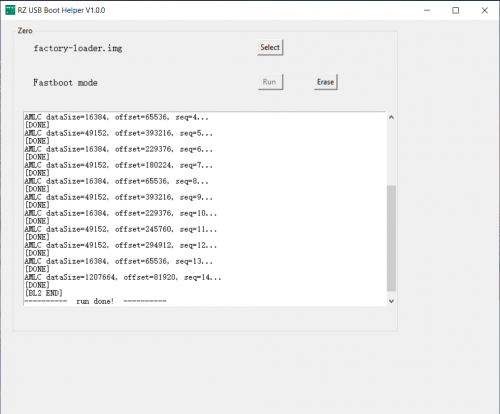
[[File:Rz-usb-helper-fastboot.png | 500px]] | [[File:Rz-usb-helper-fastboot.png | 500px]] | ||
| − | + | Once your computer detects a new USB storage device, your eMMC will be wiped and you can flash to this newly found USB device. | |
| − | + | ||
| − | + | ||
| − | + | ||
| − | + | ||
| − | + | ||
| − | + | ||
| − | + | ||
| − | + | ||
| − | + | ||
| − | + | ||
| − | + | ||
| − | + | ||
| − | + | ||
| − | + | ||
| − | + | ||
| − | + | ||
| − | + | ||
| − | + | ||
| − | + | ||
| − | + | ||
| − | + | ||
| − | + | ||
| − | + | ||
| − | + | ||
| − | + | ||
| − | + | ||
| − | + | ||
| − | + | ||
Latest revision as of 07:43, 29 November 2023
Radxa Zero > Installation > Erase eMMC
How to erase eMMC
This guide describes how to erase Radxa Zero series eMMC for installing a new system. Beware that this is not a secure erase, and only the bootloader and the partition header are wiped.
For more detailed guide on wiping eMMC (or if this fails), please refer to Boot Troubleshooting page.
Requirement
- Radxa Zero or Radxa Zero 2
- A PC/laptop running Windows, Linux, or macOS
- USB A to C cable or C to C cable, depending on your host
How to
Follow maskrom guide to setup and load radxa-zero-erase-emmc.bin or radxa-zero-2pro-erase-emmc.bin:
Once your computer detects a new USB storage device, your eMMC will be wiped and you can flash to this newly found USB device.

