Difference between revisions of "Rockpi4/install/eMMC/es es"
| (5 intermediate revisions by the same user not shown) | |||
| Line 1: | Line 1: | ||
| + | {{Languages|rockpi4/install/microSD}} | ||
{{rockpi4_header_es}} | {{rockpi4_header_es}} | ||
| − | |||
| + | <div class="col-md-12" style="text-shadow: 2px 2px 4px #DDDDDD; box-shadow: 2px 2px 5px #999999;"> | ||
[[rockpi4/es_es | ROCK Pi 4]] > [[rockpi4/install/es_es | Instalación]] > [[rockpi4/install/eMMC/es_es | Instalar en la memoria eMMC]] | [[rockpi4/es_es | ROCK Pi 4]] > [[rockpi4/install/es_es | Instalación]] > [[rockpi4/install/eMMC/es_es | Instalar en la memoria eMMC]] | ||
| − | ==== | + | ====Paso 1: Requisitos ==== |
| − | + | Esta página describe cómo descargar e instalar la imagen de un Sistema Operativo en una memoria eMMC y arrancar el ROCK Pi 4. Necesitarás por lo menos lo siguiente. | |
| − | * | + | * Un ordenador con Windows, Linux o MacOS |
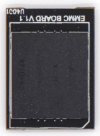
| − | * | + | * Una memoria eMMC, puedes comprarla de un distribuidor de Radxa, las memorias eMMC de Odroid o PINE64 también funcionan en ROCK Pi 4. [[File:Emmc_module_top.png | 100px]] [[File:Emmc_module_bottom.png | 100px]] |
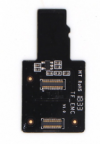
| + | * Un adaptador de memoria eMMC a microSD [[File:Emmc_to_microSD_breakout_top.png | 100px]] [[File:Emmc_to_microSD_breakout_bottom.png | 100px]] | ||
| + | * Un lector de tarjetas microSD | ||
| − | + | Para hacer funcionar el ROCK Pi 4 necesitarás ademas: | |
| − | + | ||
| + | * Una placa ROCK Pi 4 con alimentación | ||
| + | * Un cable HDMI para el monitor | ||
| + | * Un teclado y ratón USB | ||
| − | + | ====Paso 2: Descarga las Herramientas necesarias y la Imagen del Sistema Operativo ==== | |
| − | + | * Etcher es la herramienta que vamos a usar para escribir la imagen. Descarga la versión de Etcher apropiada para tu ordenador de la [[Rockpi4/downloads/es_es | página]] e instálalo. Si quieres saber más de Etcher mira en su [[https://www.balena.io/etcher/ sitio web]]. | |
| − | + | * Elige la imagen del Sistema Operativo que desees desde [[Rockpi4/downloads/es_es | aquí]] y descomprímela. El nombre de la imagen será algo así: | |
| − | + | ||
| − | + | ||
| − | + | ||
| − | + | ||
| − | + | ||
| − | * Etcher | + | |
| − | * | + | |
rockpi4_debian_stretch_lxde_armhf_20181105_2120-gpt.img | rockpi4_debian_stretch_lxde_armhf_20181105_2120-gpt.img | ||
| − | + | ====Paso 3: Escribir la Imagen en la memoria eMMC ==== | |
| − | + | ||
| − | ==== | + | |
| − | 3.1 | + | 3.1 Conecta la memoria eMMC en el adaptador eMMC a microSD y este al lector de tarjetas microSD. El lector irá conectado al ordenador. |
[[File:Emmc_module_on_card_reader.png]] | [[File:Emmc_module_on_card_reader.png]] | ||
| − | 3.2 | + | 3.2 Ejecuta la aplicación, en Ubuntu 16.04, usa el comando: |
$ /bin/bash etcher-etcher-electron-1.4.5-x86_64.AppImage | $ /bin/bash etcher-etcher-electron-1.4.5-x86_64.AppImage | ||
| − | 3.3 | + | 3.3 En etcher para windows, hacemos clic en Seleccionar Imagen. |
[[File:linux_etcher_select_image.png]] | [[File:linux_etcher_select_image.png]] | ||
| − | 3.4 | + | 3.4 En etcher para windows, hacemos clic en Seleccionar Dispositivo. |
[[File:linux_etcher_select_driver.png]] | [[File:linux_etcher_select_driver.png]] | ||
| − | 3.5 | + | 3.5 En etcher para windows, hacemos clic en el botón de grabación Flash. |
[[File:linux_etcher_select_flash_button.png]] | [[File:linux_etcher_select_flash_button.png]] | ||
| − | 3.6 | + | 3.6 En etcher para windows, se mostrará grabación Flash Completada!. |
[[File:linux_etcher_show_complete.png]] | [[File:linux_etcher_show_complete.png]] | ||
| − | + | Hecho, ya tienes instalada la imagen del Sistema Operativo en la memoria eMMC. | |
| − | ==== | + | ====Paso 4: Arranca el ROCK Pi 4 ==== |
| + | </div> | ||
Latest revision as of 17:02, 9 February 2019
ROCK Pi 4 > Instalación > Instalar en la memoria eMMC
Contents
Paso 1: Requisitos
Esta página describe cómo descargar e instalar la imagen de un Sistema Operativo en una memoria eMMC y arrancar el ROCK Pi 4. Necesitarás por lo menos lo siguiente.
- Un ordenador con Windows, Linux o MacOS
- Una memoria eMMC, puedes comprarla de un distribuidor de Radxa, las memorias eMMC de Odroid o PINE64 también funcionan en ROCK Pi 4.
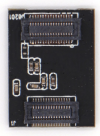
- Un adaptador de memoria eMMC a microSD

- Un lector de tarjetas microSD


Para hacer funcionar el ROCK Pi 4 necesitarás ademas:
- Una placa ROCK Pi 4 con alimentación
- Un cable HDMI para el monitor
- Un teclado y ratón USB
Paso 2: Descarga las Herramientas necesarias y la Imagen del Sistema Operativo
- Etcher es la herramienta que vamos a usar para escribir la imagen. Descarga la versión de Etcher apropiada para tu ordenador de la página e instálalo. Si quieres saber más de Etcher mira en su [sitio web].
- Elige la imagen del Sistema Operativo que desees desde aquí y descomprímela. El nombre de la imagen será algo así:
rockpi4_debian_stretch_lxde_armhf_20181105_2120-gpt.img
Paso 3: Escribir la Imagen en la memoria eMMC
3.1 Conecta la memoria eMMC en el adaptador eMMC a microSD y este al lector de tarjetas microSD. El lector irá conectado al ordenador.

3.2 Ejecuta la aplicación, en Ubuntu 16.04, usa el comando:
$ /bin/bash etcher-etcher-electron-1.4.5-x86_64.AppImage
3.3 En etcher para windows, hacemos clic en Seleccionar Imagen.

3.4 En etcher para windows, hacemos clic en Seleccionar Dispositivo.

3.5 En etcher para windows, hacemos clic en el botón de grabación Flash.

3.6 En etcher para windows, se mostrará grabación Flash Completada!.

Hecho, ya tienes instalada la imagen del Sistema Operativo en la memoria eMMC.