Zero/install/eMMC
Radxa Zero > Installation > Install image to eMMC
Contents
How to install raw images to Radxa Zero eMMC
This guide describes how to install the raw images to Radxa Zero eMMC. Raw images is compared to amlupdate format image(which is a private image format). Raw images can be mount and open on host PCs. Most of the Linux images released are raw images. Currently Android images are released in amlupdate format but this may change in the future.
Requirement
- Radxa Zero
- USB A to C cable
- A PC/laptop running Windows, Linux/macOS.
Windows
Step 1: Install drivers
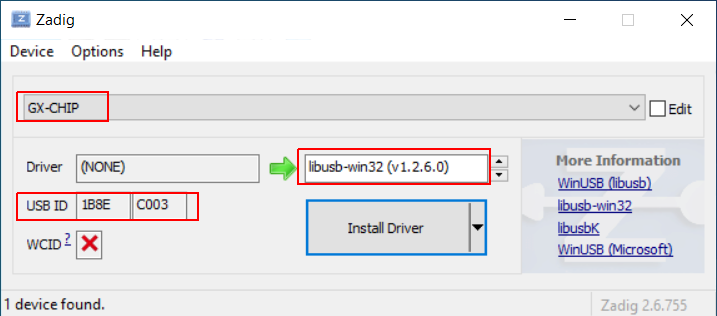
Download Zagdig, install it and choose libusb-win32, then click Install Driver.
Download the Android driver from Google:
Click here to download the Google USB Driver ZIP file (ZIP)
Unzip it and right click the .inf file to install the driver.
Step 2: Use RZ USB helper to erase eMMC and boot to USB disk mode
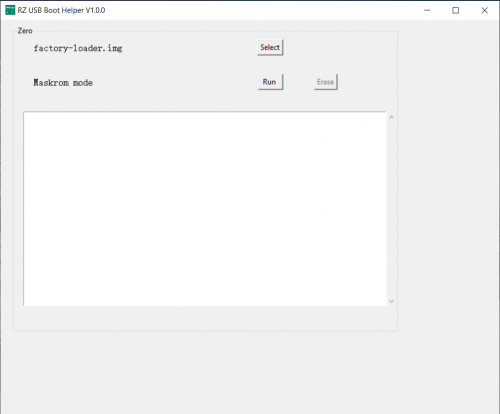
RZ USB helper is a tool by Radxa for Windows users to manage Radxa Zero booting easier. Download it from Radxa DL.
Press and hold the USB boot button on the Zero, plug in the USB to PC, Maskrom mode should be detected.
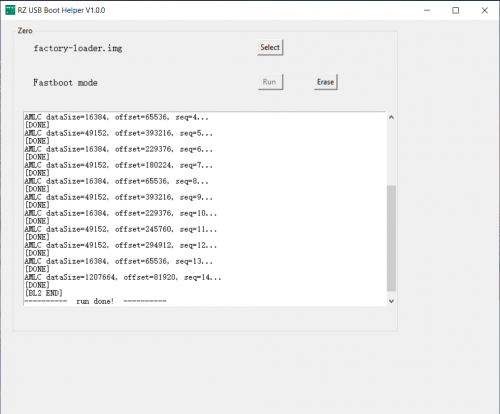
Select the loader in the RZ_USB_Boot_Helper zip and click Run.
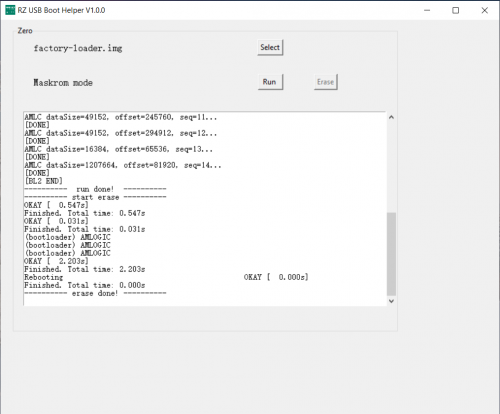
Click Erase to erase the eMMC completely.
Now download the RZ USB disk loader, select the RZ USB disk loader and click Run.
Step 3: Use Etcher to write images to eMMC
Download the latest Etcher and install it.
Linux
For Linux, we use amlogic boot tool to download the bootloader and boot the Zero into the USB Disk mode to export the eMMC to host PC as a USB Disk, then we can use dd or other tools to write images to the USB Disk(eMMC).
Step 1: Install pyamlboot tool
   sudo apt install python3-pip
   sudo pip3 install pyamlboot
Step 2: Erase Android if installed(optional)
If you have Android installed on Zero before, we suggest to wipe it. Check Erase eMMC page. If you have installed Linux or other distribution already, you can skip this step.
Step 3: Boot into USB Disk mode
Press and hold the USB boot button on Zero, plug in it to PC, lsusb should see the following:
Bus 002 Device 030: ID 1b8e:c003 Amlogic, Inc. GX-CHIP
Download the USB disk loader and run it on Zero
   wget https://dl.radxa.com/zero/images/loader/rz-udisk-loader.bin
   boot-g12.py rz-udisk-loader.bin
It should output:
Firmware Version :
ROM: 3.2 Stage: 0.0
Need Password: 0 Password OK: 1
Writing rz-fastboot-loader.bin at 0xfffa0000...
[DONE]
Running at 0xfffa0000...
[DONE]
AMLC dataSize=16384, offset=65536, seq=0...
[DONE]
AMLC dataSize=49152, offset=393216, seq=1...
[DONE]
AMLC dataSize=16384, offset=229376, seq=2...
[DONE]
AMLC dataSize=49152, offset=245760, seq=3...
[DONE]
AMLC dataSize=49152, offset=294912, seq=4...
[DONE]
AMLC dataSize=16384, offset=65536, seq=5...
[DONE]
AMLC dataSize=1406320, offset=81920, seq=6...
[DONE]
[BL2 END]
Now lsusb should show the following device:
Bus 002 Device 013: ID 1b8e:2200 Amlogic, Inc. USB download gadget Serial: AMLG12A-RADXA-ZERO
The Zero is in USB disk mode now, your PC should popup a new USB drive.
Step 4: Write image to eMMC
You can use dd to write the Linux image to the eMMC of Zero now.
   sudo dd if=/path/to/image of=/dev/sdx bs=1M
   sync
Carefully Eject the Zero USB drive and unplug and plug the power, Zero should boot the new image now.
macOS (Apple Silicon/Intel)
For macOS, we use amlogic boot tool to download the bootloader and boot the Zero into the USB Disk mode to export the eMMC to mac as a USB Disk, then we can use dd or other tools to write images to the USB Disk(eMMC).
Step 1: Install pyamlboot tool
   brew install python lsusb
   pip3 install pyamlboot
Step 2: Erase Android if installed(optional)
If you have Android installed on Zero before, we suggest to wipe it. Check Erase eMMC page. If you have installed Linux or other distribution already, you can skip this step.
Step 3: Boot into USB Disk mode
Press and hold the USB boot button on Zero, plug in it to mac, lsusb should see the following:
Bus 002 Device 030: ID 1b8e:c003 Amlogic, Inc. GX-CHIP
Download the USB disk loader and run it on Zero
   wget https://dl.radxa.com/zero/images/loader/rz-udisk-loader.bin
   boot-g12.py rz-udisk-loader.bin
It should output:
Firmware Version :
ROM: 3.2 Stage: 0.0
Need Password: 0 Password OK: 1
Writing rz-fastboot-loader.bin at 0xfffa0000...
[DONE]
Running at 0xfffa0000...
[DONE]
AMLC dataSize=16384, offset=65536, seq=0...
[DONE]
AMLC dataSize=49152, offset=393216, seq=1...
[DONE]
AMLC dataSize=16384, offset=229376, seq=2...
[DONE]
AMLC dataSize=49152, offset=245760, seq=3...
[DONE]
AMLC dataSize=49152, offset=294912, seq=4...
[DONE]
AMLC dataSize=16384, offset=65536, seq=5...
[DONE]
AMLC dataSize=1406320, offset=81920, seq=6...
[DONE]
[BL2 END]
Now lsusb should show the following device:
Bus 002 Device 013: ID 1b8e:2200 Amlogic, Inc. USB download gadget Serial: AMLG12A-RADXA-ZERO
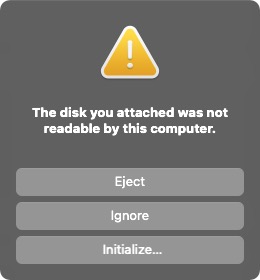
The Zero is in USB disk mode now, your mac should popup a new USB drive. Just click Ignore.
Step 4: Write image to eMMC
You can use dd to write the raw image to the eMMC of Zero now.
   sudo dd if=/path/to/image of=/dev/rdiskx bs=1m
   sync
Carefully Eject the Zero USB drive and unplug and plug the power, Zero should boot the new image now.

