Difference between revisions of "Rockpi4/Debian"
(→Change logs) |
(→Change logs) |
||
| Line 192: | Line 192: | ||
== <span id="change-log">Change logs </span>== | == <span id="change-log">Change logs </span>== | ||
| − | === | + | === Kernel === |
| − | + | {{Changelog_rockpi4_kernel}} | |
| − | + | ||
| − | + | ||
| − | + | ||
Revision as of 03:47, 7 November 2019
Contents
- 1 Work with ROCKPI4Debian
- 1.1 Introduction to ROCKPI4Debian
- 1.2 Debian Default User Account
- 1.3 Use System Tool Terminal
- 1.4 Network Connection
- 1.5 Test OpenGL ES
- 1.6 Work with M.2 NVME SSD
- 1.7 Setting Volume
- 1.8 Using Go
- 1.9 Using Editor Emacs
- 1.10 HDMI
- 1.11 Setting time zone
- 1.12 Raspberry Pi 7 Inch LCD Screen
- 1.13 CPU Overclocking
- 1.14 MIPI CSI Camera
- 2 Change logs
Work with ROCKPI4Debian
Introduction to ROCKPI4Debian
ROCKPI4Debian is an easy to use desktop system. There are two workspaces inside, desktop1 and desktop2. Click on the desktop-switch button in the bottom of the main window to switch the desktop. While working with ROCKPI4Debian, you will find it do well on playing music, playing video, Internet, Bluetooth and so on.
Debian Default User Account
Non-root User:
   User Name : linaro
   Password  : linaro
Use System Tool Terminal
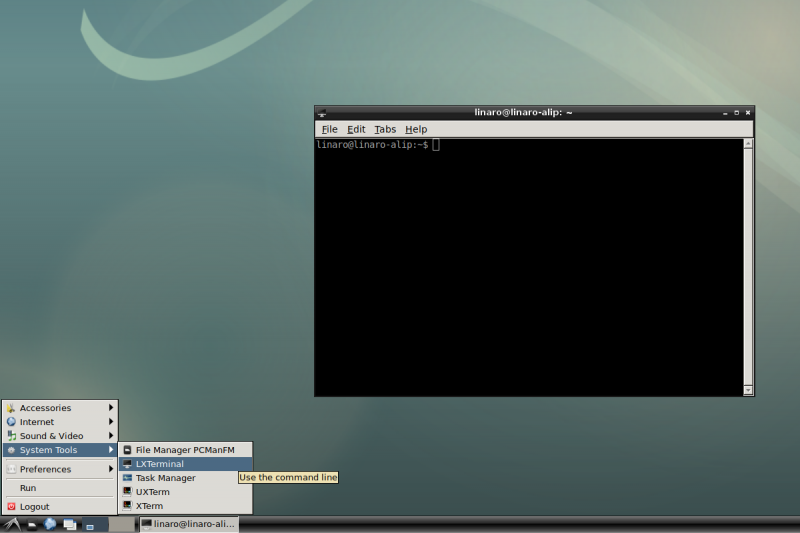
There are three kinds of tools for Terminal. They are LXTerminal, ""UXTerm"" and ""XTerm"". You are encouraged to choose your favorite one. Click on the icon, flying bird, on the bottom left in the ROCKPI4Debian's main window, and click on the icon, System Tools to select your wanted Terminal tool. Here is the LXTerminal as an example. If you try to experience more excitement, just as we want you to do that, you can type the following command to be a super user.
$ sudo su
Network Connection
There are two methods for network connection. One is Ethernet and the other is WIFI.
Ethernet Connection
You can use a network cable (one end connected to the external network port or route) to connect your ROCK Pi 4 to the network. The ROCK Pi 4 will automatically configure the network for your surfing on the Internet.
To test the Ethernet, we need to follow the steps:
- Switch to super user mode by command
$ sudo su
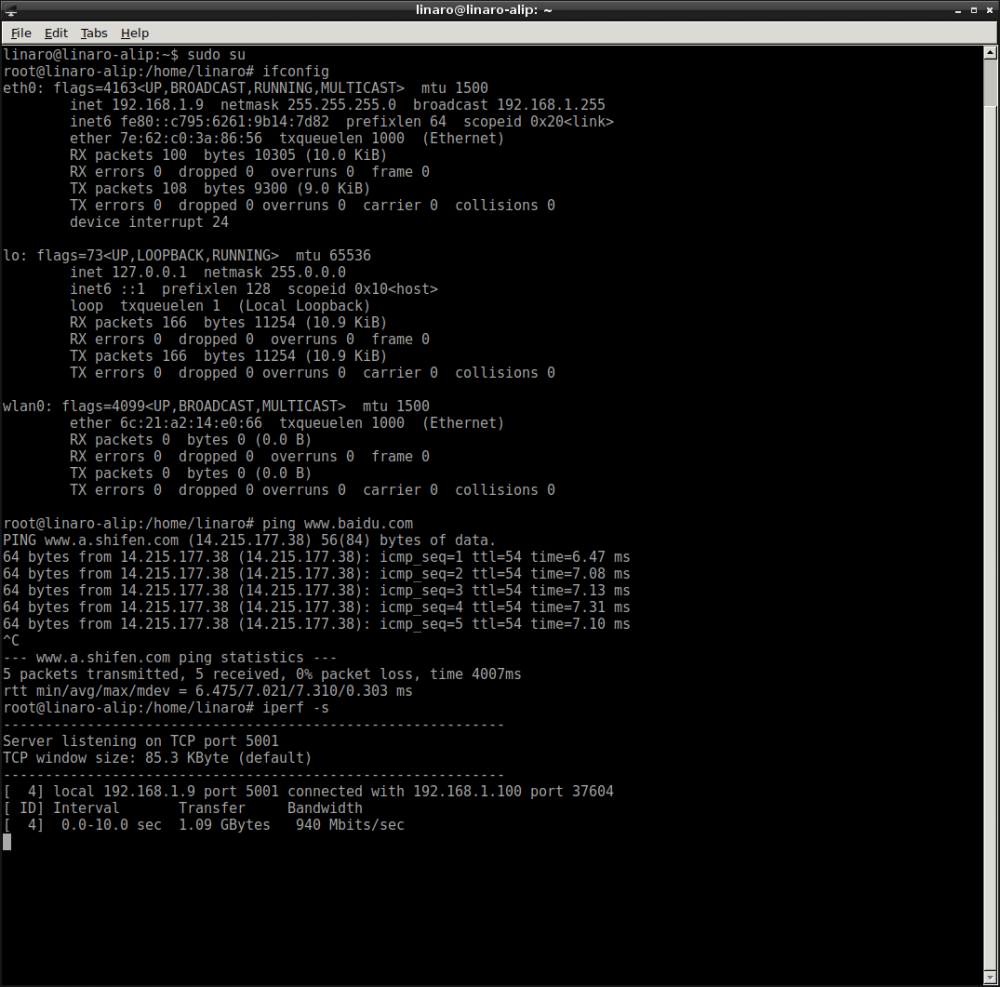
- Check whether the Ethernet is normal by command, ifconfig. Here result shows us a network card, eth0, and the Ethernet IP address, 192.168.1.9. Also, use tool, ping, to connect to a normal domain.
$ ifconfig
$ ping www.baidu.com
- To check the bandwidth, we need another machine, Host Linux (example). Here we regard ROCKPI4Desktop as a server, and Host Linux as a client
- Make sure there is iperf tool on your host PC. Maybe you can get it by $ sudo apt-get update, and $ sudo apt-get install iperf
- At the Debian terminal, execute the command, $ iperf -s
- At the Host Linux terminal, execute the command, $ iperf -c 192.168.1.9
Ethernet Test Result
- ROCKPI4Debian
- Host Linux
 $ iperf -c 192.168.1.9
 ------------------------------------------------------------
 Client connecting to 192.168.1.9, TCP port 5001
 TCP window size: 85.0 KByte (default)
 ------------------------------------------------------------
 [  3] local 192.168.1.100 port 37604 connected with 192.168.1.9 port 5001
 [ ID] Interval       Transfer     Bandwidth
 [  3]  0.0-10.0 sec  1.09 GBytes   940 Mbits/sec
You see, The Bandwidth of Ethernet is up to nearly 1000Mbits/sec. Of course, you are encouraged to set ROCKPI4Debian as a client and Host Linux as a server when testing Ethernet network performance.
WIFI Connection
When there is not a network cable for your ROCK Pi 4, the WIFI connection is another good choice. ROCK Pi 4 supports 2.4G and 5G WIFI wireless network.
To test the WIFI performance, we need to follow the steps:
- Switch to super user mode
$ sudo su
- Open the WIFI
$ nmcli r wifi on
- Scan WIFI
$ nmcli dev wifi
- Connect to WIFI network
$ nmcli dev wifi connect "wifi_name" password "wifi_password"
- Test WIFI perpormance by tool iperf
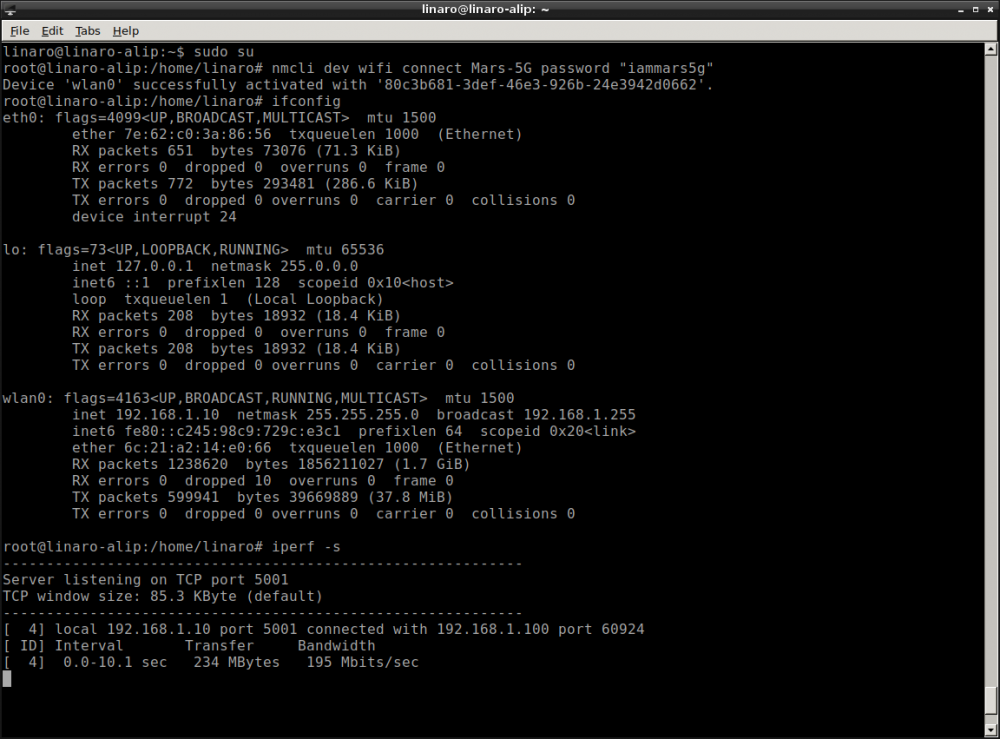
WIFI Test Result
- ROCKPI4Debian
Here we see wlan0 is working with the IP address, 192.168.31.139.
- Host Linux
 $ iperf -c 192.168.1.10
 ------------------------------------------------------------
 Client connecting to 192.168.1.10, TCP port 5001
 TCP window size: 85.0 KByte (default)
 ------------------------------------------------------------
 [  3] local 192.168.1.100 port 60924 connected with 192.168.1.10 port 5001
 [ ID] Interval       Transfer     Bandwidth
 [  3]  0.0-10.0 sec   234 MBytes   196 Mbits/sec
Test OpenGL ES
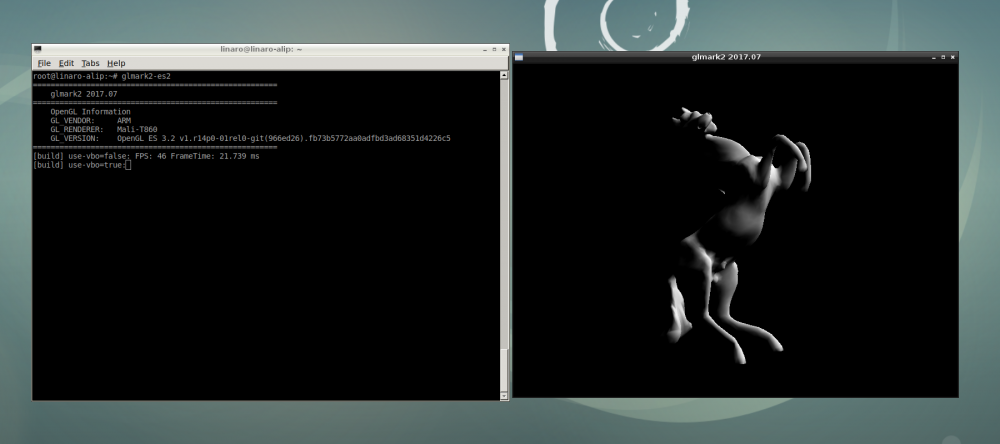
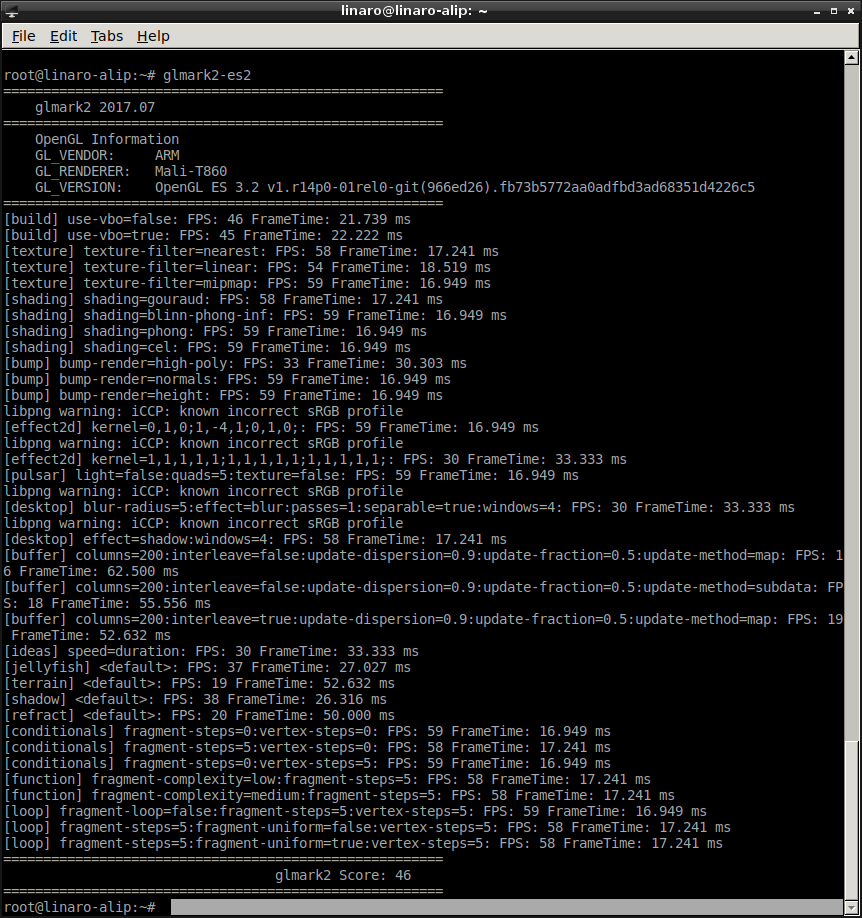
You can test it on the terminal and run the following commands:
$ glmark2-es2
Work with M.2 NVME SSD
Before supplying power for ROCK Pi 4 board, connect a Samsung EVO 960 SSD to ROCK Pi 4 Board.
Running the following commands to use the M.2 NVME SSD. Here we use a newly launched M.2 SSD.
- Switch to super user mode
$ sudo su
- Check NVME devices.The character device /dev/nvme0 is the NVME device controller, and block devices like /dev/nvme0n1 are the NVME storage namespaces. Devies like /dev/nvmen0n1 are the actual storage, which will behave essentially as disks.
$ ls /dev/nvme*
- If there is not partition in NVME device, need to use tool fdisk to create one.
$ fdisk /dev/nvme0n1
- If create partition successfully, there should be at least one partition, /dev/nvme0n1p1. Then create a file system, like:
$ mkfs.ext4 /dev/nvme0n1p1
- Finally, mount the file system. You can absolutely create a new directory to be a mounted point.
$ mount /dev/nvme0n1p1 /mnt
- Remember, if you have a M.2 SSD that have already stored data, you just need to mount it.
Improve NVMe speed
By default, the PCIe of ROCK Pi 4 runs on Gen1 mode for the most capability. Once you confirm that your NVMe works well you can try to enable the PCIe gen2 mode to get the max speed of NVMe(reading/writing > 1000MB/s).
To enable PCIe gen2 mode, make sure your /boot is mounted:
mount | grep boot
edit /boot/hw_intfc.conf, uncomment the line:
intfc:dtoverlay=pcie-gen2
save and reboot. You should have higher speed on NVMe.
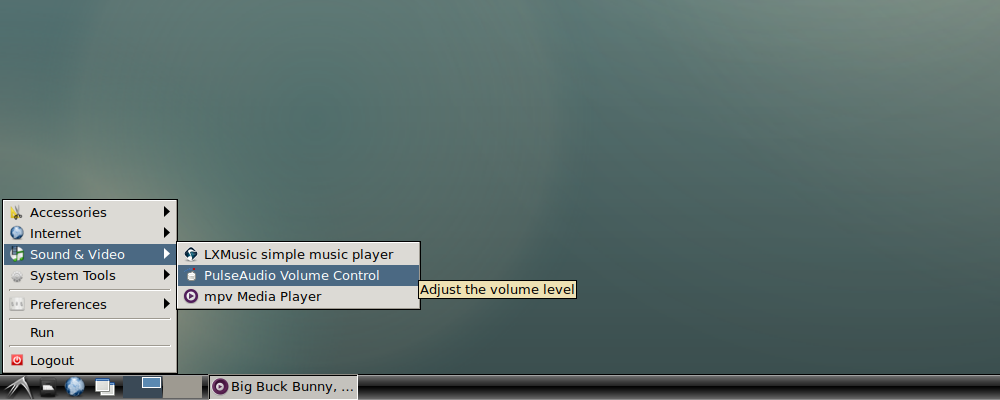
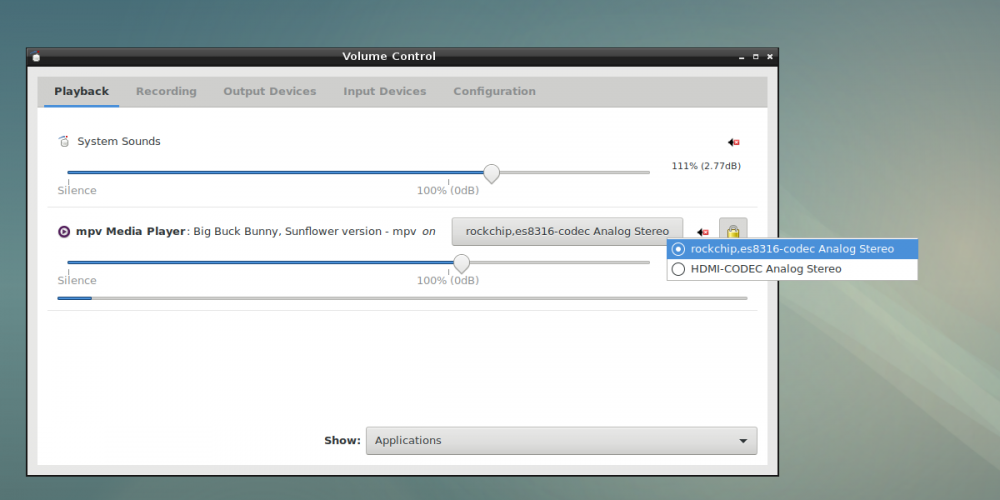
Setting Volume
When you are listening the music or watching the movie, you may need to set the output devices, headphone jack on Board or audio output port on HDMI monitor.
Using Go
Go(also golang) runs well on Debian. To get golang do:
 $ sudo su
 $ apt-get update
 $ apt-get install golang
Using Editor Emacs
Emacs runs well on Debian. To get emacs do:
 $ sudo su
 $ apt-get update
 $ apt-get install emacs
You can start the program by command line or clicking on the Emacs Icon.
$ emacs
HDMI
Enable hotplug
$ sudo chmod +x /usr/local/bin/drm-hotplug.sh
Setting time zone
Change time zone (default time is UTC(Universal Time Coordinated) time, this example is how changed it to CST(China Standard Time)):
ln -sf /usr/share/zoneinfo/Asia/Shanghai /etc/localtime
Raspberry Pi 7 Inch LCD Screen
ROCK Pi 4 Debian firmware support Rasberry Pi official 7 inch LCD screen click here to get more information.
CPU Overclocking
ROCK Pi4 Debian firmware support CPU overclocking dual Cortex-A72 core frequency can overclocking over 2GHz click here to get more information.
MIPI CSI Camera
ROCK Pi4 support Raspberry pi official camera module v2 IMX219 now, click here to know how use it.
Change logs
Kernel
2019-07-30
- Add device tree overlay for Raspberry pi official LCD screen
- Add CPU overclocking to 2GHz dtbo option
- support Raspberry pi official camera module v1 OV5647 dtbo option
- No more

