Difference between revisions of "Zero/getting started/zh cn"
< Zero | getting started
(Created page with "{{Zero_header}} {{Languages|zero/getting_started/zh_cn}} Radxa Zero > 快速开始 __NOTOC__ 这个教程适用于Radxa Zero新...") |
|||
| Line 36: | Line 36: | ||
=== 可选=== | === 可选=== | ||
* 电源适配器 | * 电源适配器 | ||
| − | |||
** Radxa Zero 的功耗比较低,可以直接使用电脑USB供电,所以不再需要准备单独的电源适配器。如果独立使用Radxa Zero,可以使用 5V,1A(至少)的电源适配器。<br/> 使用电脑USB供电请使用USB3.0(可提供900mA电流),USB2.0只有500mA的电流会导致板子不稳定。 | ** Radxa Zero 的功耗比较低,可以直接使用电脑USB供电,所以不再需要准备单独的电源适配器。如果独立使用Radxa Zero,可以使用 5V,1A(至少)的电源适配器。<br/> 使用电脑USB供电请使用USB3.0(可提供900mA电流),USB2.0只有500mA的电流会导致板子不稳定。 | ||
| Line 97: | Line 96: | ||
== 第一次上电 == | == 第一次上电 == | ||
| − | |||
| − | |||
Radxa Zero支持eMMC和SD卡启动,对于新手条件使用默认的启动方式,比如eMMC(eMMC中有出厂镜像)。 | Radxa Zero支持eMMC和SD卡启动,对于新手条件使用默认的启动方式,比如eMMC(eMMC中有出厂镜像)。 | ||
| Line 114: | Line 111: | ||
* 使用读卡器将SD卡插入电脑。 | * 使用读卡器将SD卡插入电脑。 | ||
| − | * 下载烧录工具 <code>balenaEtcher</code>, 从 [[zero/downloads | 下载]] 页面下载或直接从 [https://github.com/balena-io/etcher/releases/latest | + | * 下载烧录工具 <code>balenaEtcher</code>, 从 [[zero/downloads | 下载]] 页面下载或直接从 [https://github.com/balena-io/etcher/releases/latest GitHub release]下载。 选择使用你电脑系统的版本,这里以windows 1.7.3使用为例,最新版本类似。 |
* 安装打开balenaEtcher | * 安装打开balenaEtcher | ||
* 点击'''Select image''' to choose your system image. | * 点击'''Select image''' to choose your system image. | ||
| + | [[File:windows_etcher_select_image.png]] | ||
[[File:linux_etcher_select_image.png]] | [[File:linux_etcher_select_image.png]] | ||
Revision as of 07:19, 18 December 2023
Radxa Zero > 快速开始
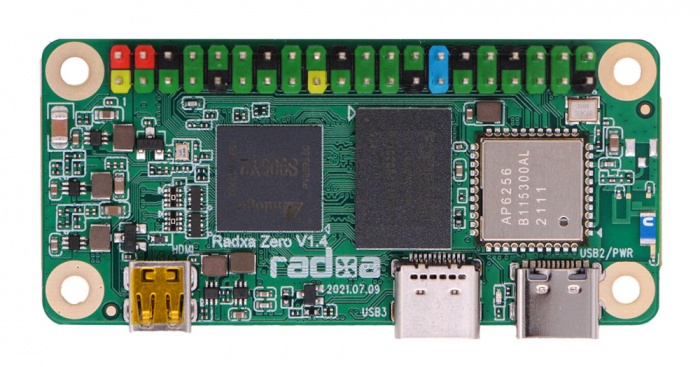
这个教程适用于Radxa Zero新手用户。在这个教程中你将可以学到Radxa Zero的基本使用。Radxa Zero有不同的配置和硬件版本。因此在进行一些操作之前需要确认你的版本。在板子的正面印有版本号信息,但是具体eMMC和内存大小需要通过芯片的丝印确定(购买信息中有这些配置)。你可以从 这里获取硬件的布局。
准备工具
必须
- Radxa Zero 开发板
- 存储设备:
- 内置的eMMC 或
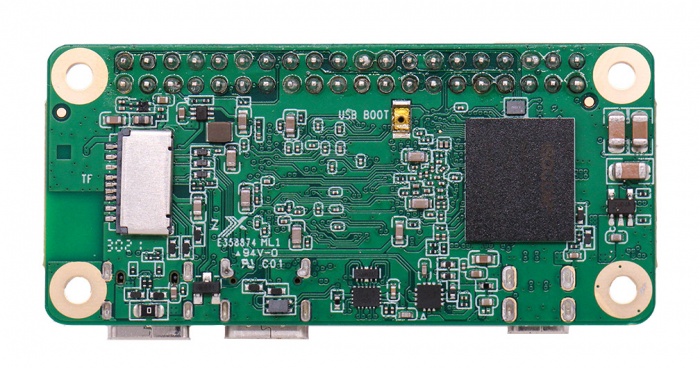
- 如果开发板没有板载eMMC需要准备一个至少8GB的sd卡. eMMC是板子背面的那个大的贴片芯片,你可以检查下你的板子是否有这个元件.
如果需要安装带有桌面环境的镜像,请使用至少16GB的sd卡,最好是32GB。
- USB-C hub
- Radxa Zero 有一个板载 Type-C USB3.0接口(靠近板子中间的那个USBC口)。这个接口支持USB3.0 Type-A和有线网,但是不具备视频输出功能。
- USB 键盘和鼠标
- 可以通过接在USB Hub上的键鼠控制Radxa Zero。
- 显示器和HDMI线
- Radxa Zero 板载一个micro HDMI的视频输出接口,需要使用micro HDMI 转标准HDMI 线连接显示器。
- HDMI的输出分辨率取决于显示器,Radxa Zero会根据显示器调整到最佳的显示分辨率。
- USB A to C 或USB C to C 数据线
- USB 数据线是用于Radxa Zero供电和传输数据的。使用USB A to C 还是USB C to C 取决于你点电脑接口类型。
- microSD 卡读卡器 (用于没有板载eMMC的板子)
- 用于烧录系统镜像。
可选
- 电源适配器
- Radxa Zero 的功耗比较低,可以直接使用电脑USB供电,所以不再需要准备单独的电源适配器。如果独立使用Radxa Zero,可以使用 5V,1A(至少)的电源适配器。
使用电脑USB供电请使用USB3.0(可提供900mA电流),USB2.0只有500mA的电流会导致板子不稳定。
- Radxa Zero 的功耗比较低,可以直接使用电脑USB供电,所以不再需要准备单独的电源适配器。如果独立使用Radxa Zero,可以使用 5V,1A(至少)的电源适配器。
- USB to TTL 串口线
- 如果需要串口控制,请准备一根串口通讯线。
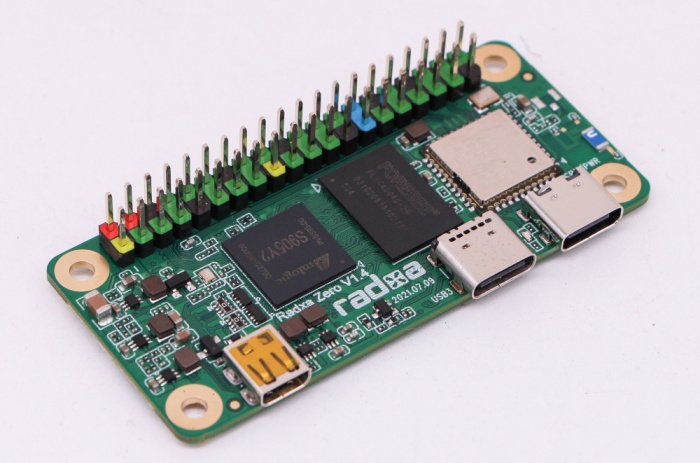
Radxa Zero 实物图
- 正面
- 侧面
- 背面
特性
| 型号 | Radxa Zero 512MB/1GB | Radxa Zero 2GB/4GB | |
|---|---|---|---|
| 处理器 | 64位 4核处理器 Amlogic S905Y2 Quad Cortex-A53@1.8GHz ARM G31 MP2 GPU, 支持OpenGL ES 3.2, Vulkan 1.0, 和OpenCL 2.0. | ||
| 内存 | LPDDR4 32bit LPDDR4@3200Mb/s | ||
| 存储 | microSD 插槽(最大支持128GB的sd卡) | 板载 8GB eMMC(2GB 内存版本) 或16GB/32GB/64GB/128GB eMMC(4GB 内存版本) microSD 插槽(最大支持128GB的sd卡) | |
| 显示 | HDMI 2.0 up to 4K@60 | ||
| 摄像头 | 无 | ||
| 无线 | 802.11 a/b/g/n (WiFi 4) BT 4.0 板载天线(可选外置天线) |
802.11 ac (WiFi 5) BT 5.0 板载天线(可选外置天线) | |
| USB | 1 x USB 2.0 Type-C OTG & Power combo port 1 x USB 3.0 Type-C HOST | ||
| IO接口 | 40-pin(2.5mm) 扩展接口 2 x UART 2 x SPI bus 3 x I2C bus 1 x PCM/I2S 1 x SPDIF 2 x PWM 1 x ADC 6 x GPIO 2 x 5V DC power in 2 x 3.3V DC power in | ||
| 其他 | 一个用于固件更新的按钮 | ||
| 电源 | USB-C, 5V/1A | ||
| 尺寸 | 66mm x 30.5mm | ||
Contents
第一次上电
Radxa Zero支持eMMC和SD卡启动,对于新手条件使用默认的启动方式,比如eMMC(eMMC中有出厂镜像)。
选择存储设备
- eMMC烧录镜像
如果你想安装其他系统到eMMC,首先需要 擦除eMMC,然后 下载 其他支持的Linux发行版进行 安装。你页可以按照 教程安装安卓系统。
- SD卡烧录镜像
请按照以下步骤操作。
烧入镜像
- 使用读卡器将SD卡插入电脑。
- 下载烧录工具
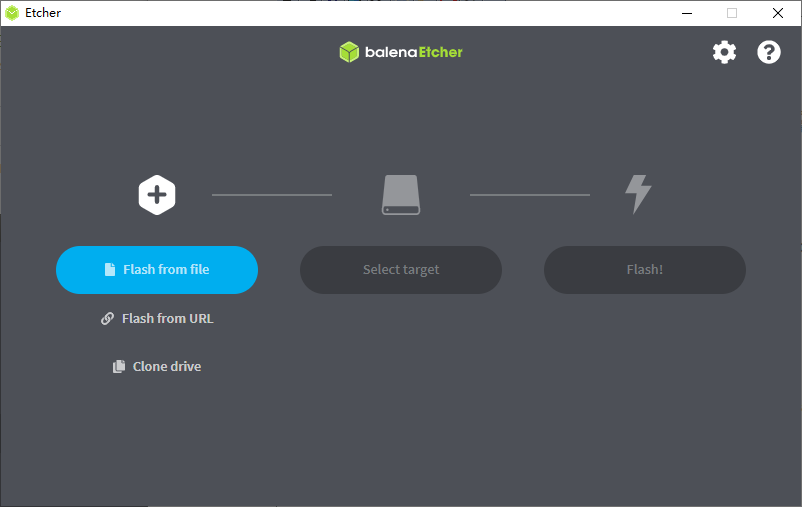
balenaEtcher, 从 下载 页面下载或直接从 GitHub release下载。 选择使用你电脑系统的版本,这里以windows 1.7.3使用为例,最新版本类似。 - 安装打开balenaEtcher
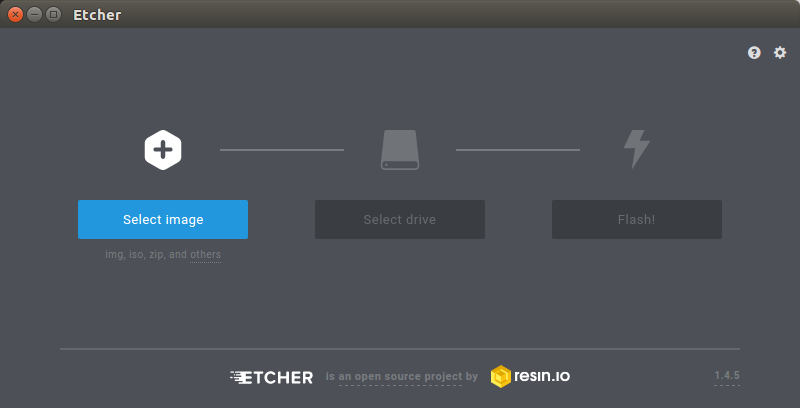
- 点击Select image to choose your system image.
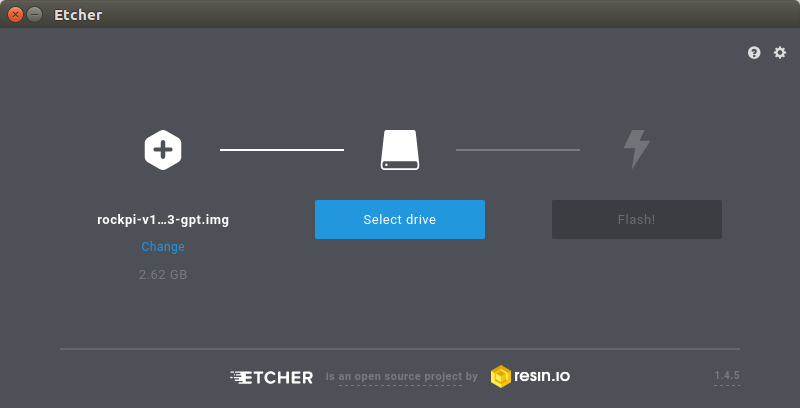
- IClick Select Drive to select your microSD card. Please read your options carefully, as you may lose precious data when choosing a wrong drive!
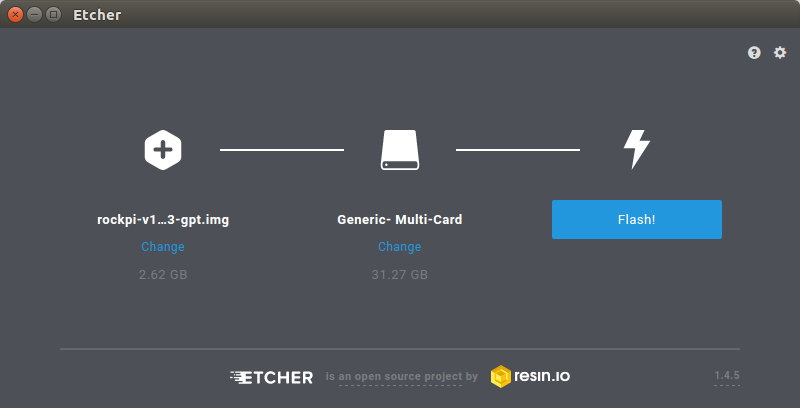
- Click Flash to begin the flashing process.
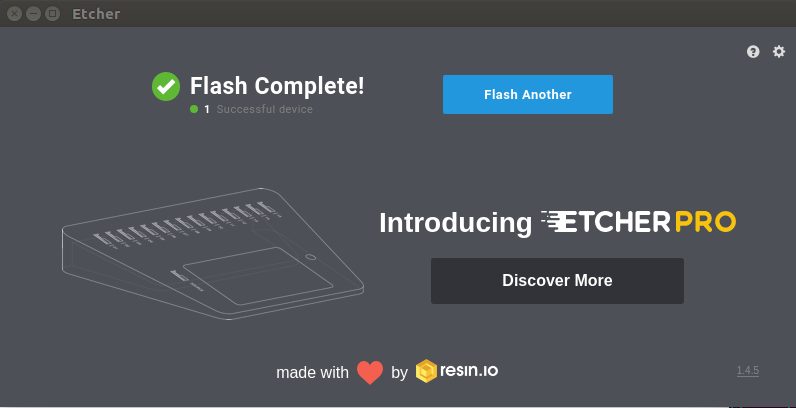
- Once the window shows
Flash Complete!you can now safely remove the microSD card from your host computer.
Boot
- To boot from microSD card, put flashed card into your Radxa Zero.
- To boot from eMMC, eject Radxa Zero from your host PC and unplug the USB-C cable from host PC.
- Connect Radxa Zero to your display with the HDMI cable. Make sure the display's input source is correctly set to your Radxa Zero.
- Connect the USB-C hub with keyboard and mouse to your Radxa Zero.
- Connect the power supply to your Radxa Zero. The board will boot immediately.
Enjoy!
Troubleshooting
- Refer Troubleshooting page
- Post your issue on our forum
- Join our discord

