Difference between revisions of "Zero/install/eMMC erase"
RadxaYuntian (Talk | contribs) |
RadxaYuntian (Talk | contribs) |
||
| Line 6: | Line 6: | ||
This guide describes how to erase Radxa Zero's eMMC for installing a new system. Beware that this is not a secure erase, and only the bootloader and the partition header are wiped. | This guide describes how to erase Radxa Zero's eMMC for installing a new system. Beware that this is not a secure erase, and only the bootloader and the partition header are wiped. | ||
| + | |||
| + | For more detailed guide on wiping eMMC, please refer to [[Zero/install/Boot_Troubleshooting | Boot Troubleshooting]] page. | ||
== Requirement == | == Requirement == | ||
| Line 26: | Line 28: | ||
After the tool exits, wait for 10 seconds and your eMMC should be wiped. | After the tool exits, wait for 10 seconds and your eMMC should be wiped. | ||
| − | |||
| − | |||
Revision as of 09:21, 17 January 2022
Radxa Zero > Installation > Erase eMMC
How to erase eMMC
This guide describes how to erase Radxa Zero's eMMC for installing a new system. Beware that this is not a secure erase, and only the bootloader and the partition header are wiped.
For more detailed guide on wiping eMMC, please refer to Boot Troubleshooting page.
Requirement
- Radxa Zero
- A PC/laptop running Windows, Linux, or macOS
- USB A to C cable or C to C cable, depending on your host
Windows
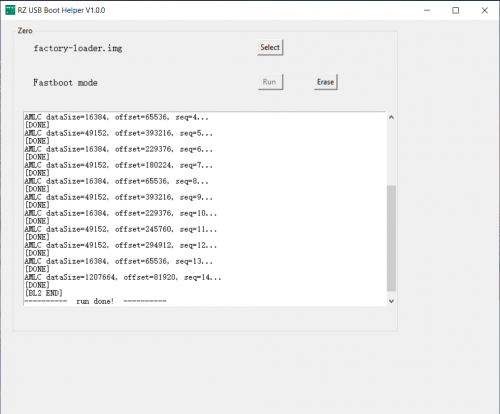
First, follow maskrom guide to setup and load radxa-zero-erase-emmc.bin:
After the tool shows "run done", wait for 10 seconds and your eMMC should be wiped.
Linux & macOS
First, follow maskrom guide to setup and load radxa-zero-erase-emmc.bin.
After the tool exits, wait for 10 seconds and your eMMC should be wiped.

