Difference between revisions of "Rockpi4/getting started"
< Rockpi4
(Created page with " {{rockpi4_header}} __TOC__ This guide is designed for ROCK Pi 4 enthusiast. We wish you can learn about ROCK Pi 4 board as well as how to prepare and set up for basic use...") |
|||
| Line 152: | Line 152: | ||
* Download the flash tool, [etcher](https://etcher.io). Choose the right version for your host operation system. Here we operate on host Ubuntu 16.04. | * Download the flash tool, [etcher](https://etcher.io). Choose the right version for your host operation system. Here we operate on host Ubuntu 16.04. | ||
| − | + | [[File:linux_etcher_download_website.png]] | |
| − | + | * After unpacking the package, we run the tool by executing the command | |
`$ /bin/bash etcher-etcher-electron-1.4.5-x86_64.AppImage` | `$ /bin/bash etcher-etcher-electron-1.4.5-x86_64.AppImage` | ||
* In the etcher window, we click button Select image. | * In the etcher window, we click button Select image. | ||
| − | + | [[File:linux_etcher_select_image.png]] | |
* In the etcher window, we click button Select Drive. | * In the etcher window, we click button Select Drive. | ||
| − | + | [[File:linux_etcher_select_drive.png]] | |
* In the etcher window, we click button Flash. | * In the etcher window, we click button Flash. | ||
| − | + | [[File:linux_etcher_select_flash.png]] | |
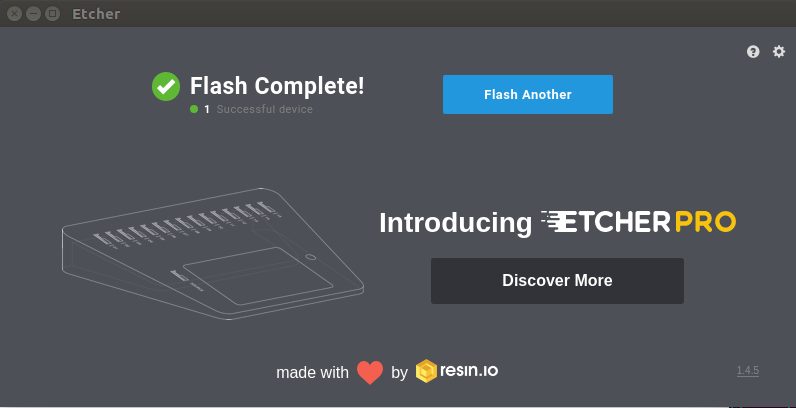
* In the etcher window, it shows us Flash Complete! | * In the etcher window, it shows us Flash Complete! | ||
| − | + | [[File:linux_etcher_show_complete.png]] | |
| + | |||
=== Boot === | === Boot === | ||
Revision as of 07:03, 26 October 2018
Contents
This guide is designed for ROCK Pi 4 enthusiast. We wish you can learn about ROCK Pi 4 board as well as how to prepare and set up for basic use.
What you need
- ROCK Pi 4 main board
- Power supply
- The ROCK Pi 4 requires a 9V-20V with 1500mA Power adapter, included in the standard package
- USB Keyboard and Mouse
- With four USB-A connectors, ROCK Pi 4 can be equiped with a full sized keyboard and mouse
- Monitor and HDMI Cable
- ROCK Pi 4 is equiped with a full sized HDMI connector. HDMI capable monitor is recommended
- MicroSD Card Reader
- For flashing the image into uSD Card or eMMC Module.
- One of the Storage media below:
- uSD card larger than 8GB.
- eMMC Module larger than 8GB with eMMC to uSD converter board
- USB type A to type A cable
- This is needed for fastboot/adb commands.
- USB to TTL serial cable
- This is needed for serial console.
- Ethernet cable
- ROCK PI supports Internet access via WIFI or Ethernet.
- An Ethernet cable is used to connect your ROCK PI to a local network and the Internet.
- Camera Module
- ROCK PI supports camera function.
- LCD Module
- ROCK PI supports LCD display function.
- Audio lead
- Audio can be played through speaker or headphones using a standard 3.5mm jack.
Out of the ROCK PI box
The standard ROCK PI packages contains the follow: (附上ROCK PI 包图片)
- Main board
- 9V/2A power adapter
- Transparent acrylic case
- Screws(M3)
- Heatsink(22mm x 22mm)
- Heatsink Plaster
Close look of ROCK PI 4
Assemble the case
The package comes with a simple acrylic case, assemble it first:
1. Remvoe the protecting film of the acrylic case:
2. Assemble the case and screws with screwer, finished as below:
3. Glue the heatsink with Heatsink Plaster at the bottom side:
Features
| Model | ROCK PI 4 Model A | ROCK PI 4 Model B |
|---|---|---|
| Processor | 64bits hexa core processor Rockchip RK3399 Dual Cortex-72, frequency 1.8GHz with qual Cortex-A53, frequency 1.4GHz Mail T860MP4 gpu, support OpenGL ES 1.1/2.0/3.0/3.1/3.2, Vulkan 1.0, Open CL 1.1 1.2, DX11. | |
| Memory | LPDDR4 64bit dual channel LPDDR4@3200Mb/s, 1GB/2GB/4GB optioal | |
| Storage | __eMMC module__ Optional insudtrial compatible high performance eMMC module, 8GB/16GB/32GB/64GB/128GB available uSD card<uSD slot supports up to 128 GB uSD card M.2 SSD M.2 connector supports up to 2T M2 NVME SSD | |
| Display | HDMI 2.0 up to 4k@60 MIPI DSI 2 lanes via FPC connector HDMI and MIPI DSI can work at the same time, support mirror mode or extend mode. | |
| Audio | 3.5mm jack with mic HD codec that supports up to 24-bit/96KHz audio. | |
| Camera | MIPI CSI MIPI CSI 2 lanes via FPC connector, support up to 800 MP camera. | |
| Wireless | None | 802.11 ac wifi Bluetooth 5.0 with on board antenna |
| USB | USB 3.0 OTG X1, hardware switch for host/device switch, upper one USB 3.0 HOST X1, dedicated USB 3.0 channel, lower one USB 2.0 HOST X2 | |
| Ethernet | GbE LAN | GbE LAN with PoE support additional HAT is required for powering from PoE |
| IO | 40-pin expansion header 1 x UART 2 x SPI bus 2 x I2C bus 1 x PCM/I2S 1 x SPDIF 1 x PWM 1 x ADC 6 x GPIO 2 x 5V DC power in 2 x 3.3V DC power in | |
| Others | RTC RTC battery connector for time backup(optioal) | |
| Power | USB PD, support USB Type C PD 2.0, 9V/2A, 12V/2A, 15V/2A, 20V/2A. Qualcomm® Quick ChargeTM: Supports QC 3.0/2.0 adapter, 9V/2A, 12V/1.5A | |
| Size | 85mm x 54mm | |
- HDMI EDID display data is used to determine the best display resolution. On monitors and TVs that support 1080p (or 4K) this resolution will be selected. If 1080p is not supported the next available resolution reported by EDID will be used. This selected mode will work with **MOST but not all** monitors/TVs.
Starting the board for the first time
You will be presented with two optionals when installing your new operating system onto your ROCK PI 4.
Prepare
Running on eMMC Module Method
- Insert eMMC Module into eMMC to MicroSD card converter board. Insert the converter board into MicroSD Card Reader, which connects to host computer. The picture below shows.
(附上eMMC、eMMC转uSD模块、读卡器图片)
Running on MicroSD Card Method
- Insert the MicroSD Card into MicroSD Card Reader, which connects to host computer. The picture below shows.
(附上uSD卡和读卡器图片)
Write Image
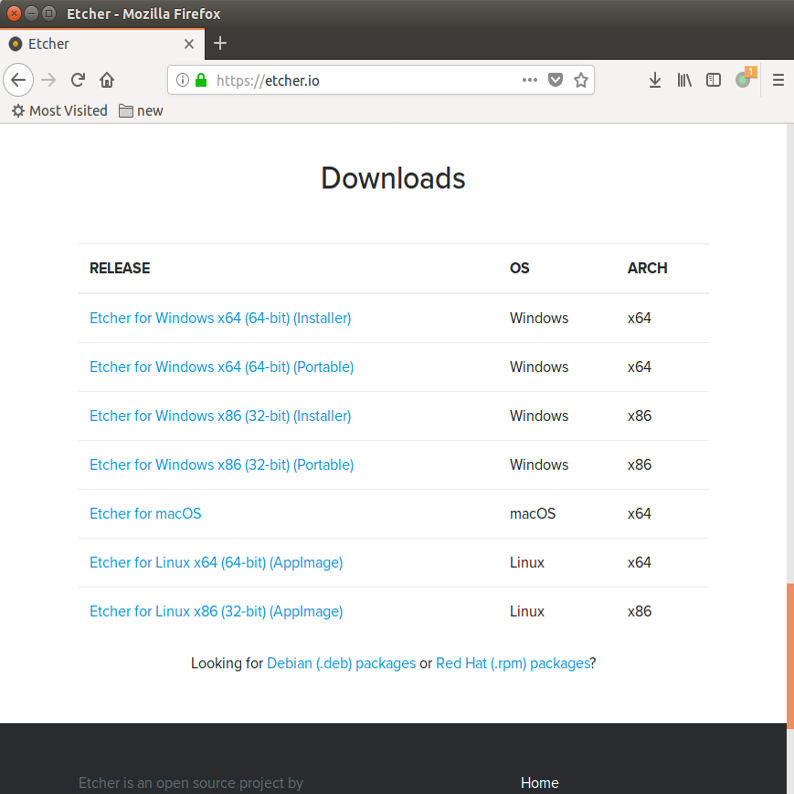
- Download the flash tool, [etcher](https://etcher.io). Choose the right version for your host operation system. Here we operate on host Ubuntu 16.04.
- After unpacking the package, we run the tool by executing the command
`$ /bin/bash etcher-etcher-electron-1.4.5-x86_64.AppImage`
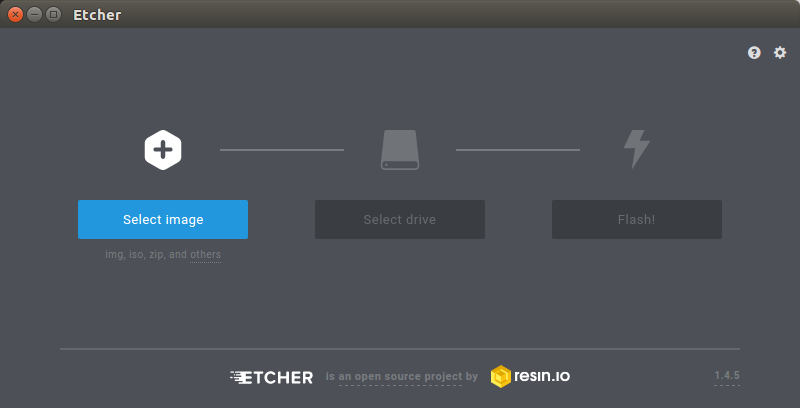
- In the etcher window, we click button Select image.
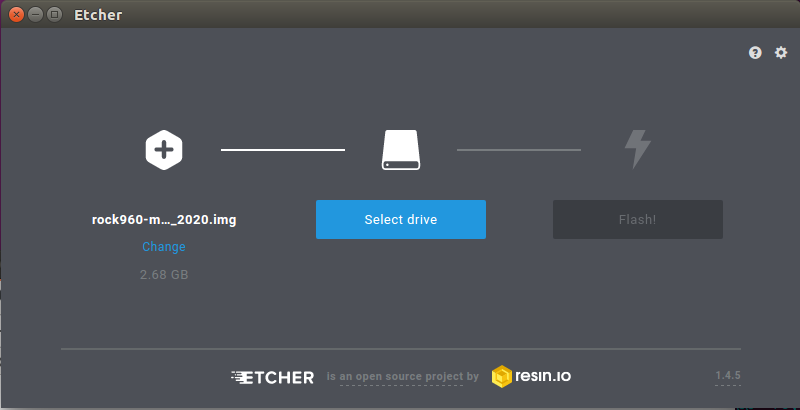
- In the etcher window, we click button Select Drive.
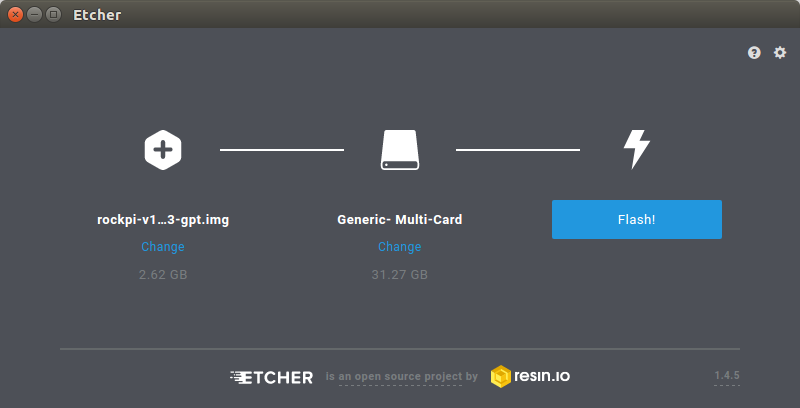
- In the etcher window, we click button Flash.
- In the etcher window, it shows us Flash Complete!
Boot
Running on eMMC Module
- Now insert eMMC module with firmware inside into the socket on board. The picture below shows.
Running on MicroSD Card
- Now insert MicroSD Card with firmware inside into the MicroSD card slot on board. The picture below shows.
- Connect the ROCK PI to your display with the HDMI cable. Ensure that the source for the display is switched to the HDMI port you are using.
- Connect the USB keyboard and mouse.
- Connect the power supply to the ROCK PI. The board will begin to immediately.

