Rock/Hdmi Resolution
Note:
1) the method is suit for rock pro, rock lite & rock2 square
2) the method is suit for Android & Linux
Step 1: Get the EDID parameter by tools
Note: There is just tool under windows, we will provide tool under linux Later
1) Download the tools here: http://dl.radxa.com/users/yao/sm_setup.exe
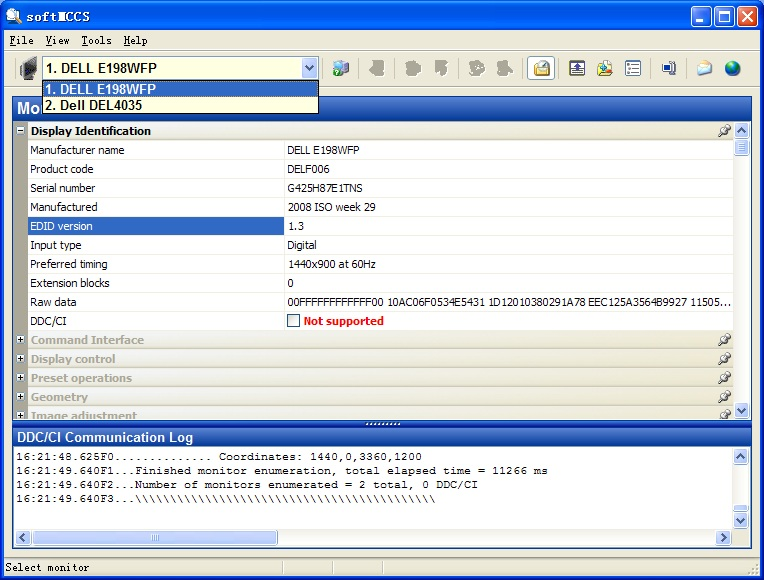
2 )Install sm_setup.exe, then run it (SoftMCCS)
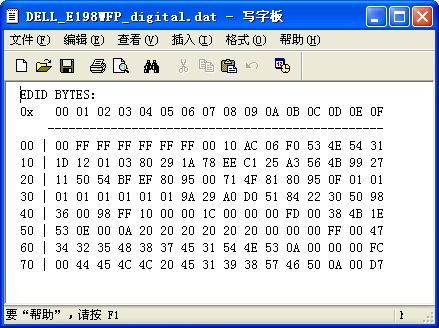
3) Select your Display Mode, then choose "File->Save EDID as " and save the file as "Raylar EDID file (*.dat)", you can open and edit the dat file, you will see as below:
Step2: Parse the EDID file by tool (Phoenix)
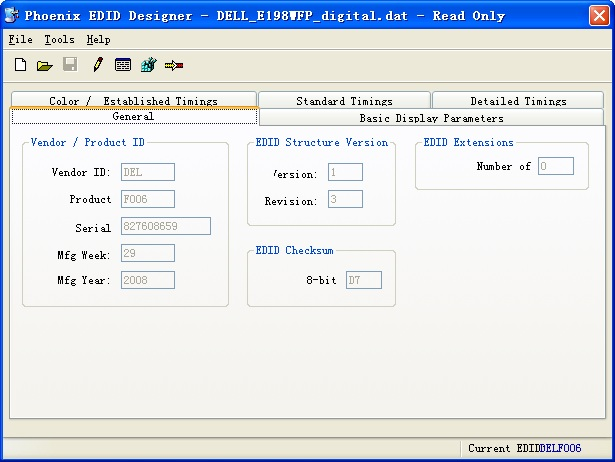
you can download here http://dl.radxa.com/users/yao/Phoenix.zip run the tool, "File -> Open EDID..." to open the dat file saved by SoftMCCS
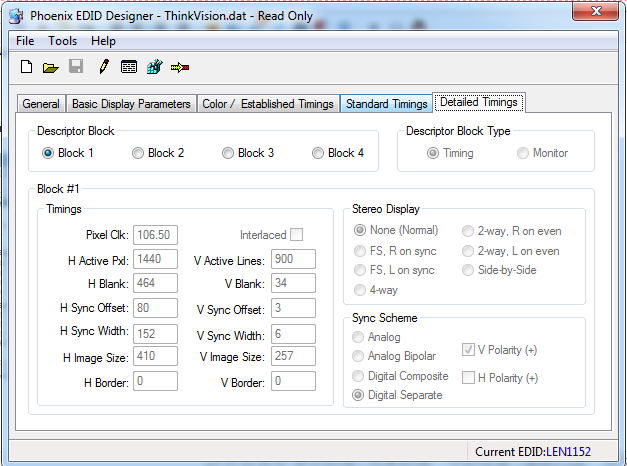
Select "Detailed Timings"
From the above picture, we can get these parameter needed by driver file.
"kernel/drivers/video/rockchip/hdmi/hdmi-lcdc.c"
/* name refresh xres yres pixclock h_bp h_fp v_bp v_fp h_pw v_pw polariry PorI flag vic 2ndvic pixelrepeat interface */
{ { "1440x900p@60Hz", 60, 1440, 900, 106500000, 232, 80, 25, 3, 152, 6, 0, 0, 0 }, 2, 0, 1, OUT_P888},
Note :
H = Horizontal, V = vertical
Pixel Clk: 106500000 (106.50MHz)
Resolution: xres=1440, yres=900.
h_fp = H sync Offset = 80
h_pw = H sync width = 152;
h_bp = H Blank - h_fp - h_pw = 464 - 80 - 152 = 232;
v_fp = V Sync Offset = 3
v_pw = V sync width = 6
v_bp = V Blank - v_fp -v_pw = 25
Add line like “1440x900p@60Hz....”use the parameter value above. (the other parameter can use like ""1440x900p@60Hz..." )
Then cd kernel, make clean and re-compile
Step 3: Flash the image, and set the resolution
Android:
you can set by Settings->Display->HDMI Mode
Linux:
#cat /sys/class/display/display0.HDMI/modes
1920x1080p-60
...
1440x900p-60
..
echo #echo 1440x900p-60 > /sys/class/display/display0.HDMI/mode
The above are the whole steps. we have serveral customers tested ok. but we can't make sure it is fitted for all.
Q&A
1) After set the new resolution, I found the refresh frequency is not the same as the setting. e.g. I set "1360x768@60Hz",the display shows "1360x768@46", what's the problem.
It caused by the pixclock changed by the system. The system will choose another value it think more suitable base on the pixclock you set on the "drivers/video/rockchip/hdmi/hdmi-lcdc.c", you can get the value for kernel log.
e.g.
I modify "1360x768@60Hz, pixclock = 85500000". in the "drivers/video/rockchip/hdmi/hdmi-lcdc.c", but the result shows on display is "1360x768@46Hz",
At last I found the pixclock clock the system used is "75000000" not "85500000" we set like the below message.
[ 119.205896] lcdc1: dclk:75000000>>fps:46
then how to fix this?
Use the pixclock "75000000" set by the system, adjusts the values of " h_fp,h_bp,h_pw. v_fp,v_bp,v_pw" to fit the formula
(xres + h_fp + h_bp + h_pw) x (yres + v_fp + v_bp + v_pw) * fps = pixclock. (the fps is refresh frequency value. e.g. 1360x768@60Hz, the fps = 60)
then update the value in the "drivers/video/rockchip/hdmi/hdmi-lcdc.c".
2)The resolution and fps are all right. but the screen shows mess
It caused by the values of "h_fp,h_bp,h_pw. v_fp,v_bp,v_pw" are not suitable, you can adjust them base on
(xres + h_fp + h_bp + h_pw) x (yres + v_fp + v_bp + v_pw) * fps = pixclock. and then update on the file
"drivers/video/rockchip/hdmi/hdmi-lcdc.c".
3)I can't found the resolution item after I add the new resolution in "drivers/video/rockchip/hdmi/hdmi-lcdc.c".
Make sure you execute "make clean" under kernel and re-compile.
Any question please send Email to support@radxa.com


