Difference between revisions of "Rock3/getting started"
< Rock3
| (18 intermediate revisions by 3 users not shown) | |||
| Line 2: | Line 2: | ||
{{Languages|rock3/getting_started}} | {{Languages|rock3/getting_started}} | ||
| + | __NOTOC__ | ||
| − | + | <div class="col-md-12"> | |
| + | <h3 class="brand-name text-center" style="margin-top:0px;"><span class="label flame">Getting started</span></h3> | ||
| + | <hr class="tagline-divider" /> | ||
| + | <h5 class="text-center" style="margin-bottom:20px;">Choose your ROCK3 model to start</h5> | ||
| + | </div> | ||
| − | + | <div class="col-md-12 "> | |
| − | + | <div class="col-md-3"> | |
| + | <div class="panel panel-meadow"> | ||
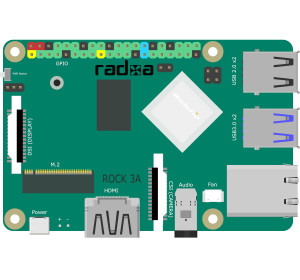
| + | <div class="panel-heading"> <h3 class="panel-title"><i class="fa fa-hand-o-up"></i> [[rock3/3a/getting_started | ROCK 3A]]</h3> </div> | ||
| + | <div class="panel-body"> | ||
| + | <div class="thumbnail ">[[File:Start_3a.png | 300px | link=rock3/3a/getting_started]]</div> | ||
| + | </div> | ||
| + | </div> | ||
| + | </div> | ||
| + | <div class="col-md-3"> | ||
| + | <div class="panel panel-meadow"> | ||
| + | <div class="panel-heading"> <h3 class="panel-title"><i class="fa fa-hand-o-up"></i> [[rock3/3b/getting_started | ROCK 3B]]</h3> </div> | ||
| + | <div class="panel-body"> | ||
| + | <div class="thumbnail ">[[File:Start_3b.png| 300px | link=rock3/3b/getting_started]]</div> | ||
| + | </div> | ||
| + | </div> | ||
| + | </div> | ||
| + | <div class="col-md-3"> | ||
| + | <div class="panel panel-meadow"> | ||
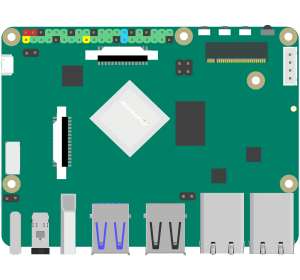
| + | <div class="panel-heading"> <h3 class="panel-title"><i class="fa fa-hand-o-up"></i> [[Rock3/CM3/IO/getting_started | CM3 IO board]]</h3> </div> | ||
| + | <div class="panel-body"> | ||
| + | <div class="thumbnail ">[[File:Start_io.png| 300px | link=Rock3/CM3/IO/getting_started]]</div> | ||
| + | </div> | ||
| + | </div> | ||
| + | </div> | ||
| + | <div class="col-md-3"> | ||
| + | <div class="panel panel-meadow"> | ||
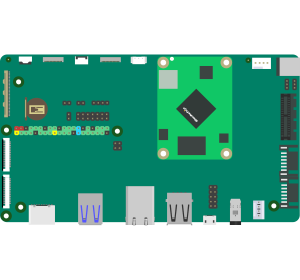
| + | <div class="panel-heading"> <h3 class="panel-title"><i class="fa fa-hand-o-up"></i> [[rock3/CM3/e23/getting_started | E23]]</h3> </div> | ||
| + | <div class="panel-body"> | ||
| + | <div class="thumbnail ">[[File:Start_e23.png| 300px | link=rock3/CM3/e23/getting_started]]</div> | ||
| + | </div> | ||
| + | </div> | ||
| + | </div> | ||
| + | <div class="col-md-3"> | ||
| + | <div class="panel panel-meadow"> | ||
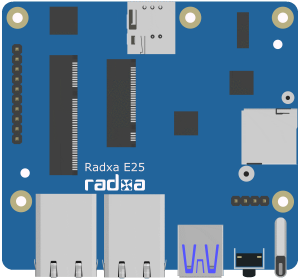
| + | <div class="panel-heading"> <h3 class="panel-title"><i class="fa fa-hand-o-up"></i> [[rock3/CM3p/e25/getting_started | E25]]</h3> </div> | ||
| + | <div class="panel-body"> | ||
| + | <div class="thumbnail ">[[File:Start_e25.png| 300px | link=rock3/CM3p/e25/getting_started]]</div> | ||
| + | </div> | ||
| + | </div> | ||
| + | </div> | ||
| − | + | </div> | |
| − | + | ||
| − | + | ||
| − | + | ||
| − | + | ||
| − | + | ||
| − | + | ||
| − | + | ||
| − | + | ||
| − | + | ||
| − | + | ||
| − | + | ||
| − | + | ||
| − | + | ||
| − | + | ||
| − | + | ||
| − | + | ||
| − | + | ||
| − | + | ||
| − | + | ||
| − | + | ||
| − | + | ||
| − | + | ||
| − | + | ||
| − | + | ||
| − | + | ||
| − | + | ||
| − | + | ||
| − | + | ||
| − | + | ||
| − | + | ||
| − | + | ||
| − | + | ||
| − | + | ||
| − | + | ||
| − | + | ||
| − | + | ||
| − | + | ||
| − | + | ||
| − | + | ||
| − | + | ||
| − | + | ||
| − | + | ||
| − | + | ||
| − | + | ||
| − | + | ||
| − | + | ||
| − | + | ||
| − | + | ||
| − | + | ||
| − | + | ||
| − | + | ||
| − | + | ||
| − | + | ||
| − | + | ||
| − | + | ||
Revision as of 12:38, 22 January 2022