RockpiX/install/Windows.wim
ROCK Pi X > Install > Install Windows .wim image to ROCK Pi X (eMMC)
Contents
[hide]Introduction
The Windows Imaging Format (WIM) is a file-based disk image format. It was developed by Microsoft to help deploy Windows Vista and subsequent versions of the Windows operating system family.
Prepare
- Windows .wim Image - You need a copy of the Windows .wim image, which can be downloaded from Install.WIM.
- USB drive - We need this as the installation media
- ROCK Pi X - It doesn't matter if the board has OS running already or not, as long as we have proper BIOS installed, we can install a new OS
- Keyboard/mouse and HDMI monitor for ROCK Pi X - We need to operate on ROCK Pi X
- Rockpi_x_win10_installer - It is a small WinPE system, we will use it to complete the deployment of Wim images. Download here rockpi_x_win10_installer.tar.gz
- Another PC(HOST PC) running Windows or Linux - We need to make bootable USB drive from Rockpi_x_win10_installer on this PC
Step 1: Make a bootable USB disk from Rockpi_x_win10_installer
Windows HOST
We use Rockpi_x_win10_installer to make a boot disk on Windows:
1. Insert your USB flash drive into the Windows host, we will use the diskpart command tool to format the USB flash drive:
C:\WINDOWS\system32>diskpart

Microsoft DiskPart version 10.0.18362.1

Copyright (C) Microsoft Corporation.
On computer: DESKTOP-NT5FLRV

DISKPART> list disk

  Disk ###  Status         Size     Free     Dyn  Gpt
  --------  -------------  -------  -------  ---  ---
  Disk 0    Online           28 GB      0 B        *
  Disk 1    Online           58 GB      0 B

DISKPART> select disk 1

Disk 1 is now the selected disk.

DISKPART> clean

DiskPart succeeded in cleaning the disk.

DISKPART> create partition primary

DiskPart succeeded in creating the specified partition.

DISKPART> active

DiskPart marked the current partition as active.

DISKPART> format fs="ntfs" label="WinDeploy" quick

  100 percent completed

DiskPart successfully formatted the volume.

DISKPART> assign letter=I

DiskPart successfully assigned the drive letter or mount point.

DISKPART> exit

Leaving DiskPart...
2. You will need to download rockpi_x_win10_installer.tar.gz and unzip it to the root directory of the USB flash drive,U disk directory structure is as follows:
.
├── Boot
├── bootmgr
├── DriverInfolist.txt
├── EFI
└── Images
3. You will need to download Install.WIM (You can use the Dism tool to capture the desired .wim image) and put it in the Images directory.
.
├── Boot
├── bootmgr
├── DriverInfolist.txt
├── EFI
└── Images
                ├── Install.WIM
                ├── unattend.xml
                └── Winre.wim
Linux HOST
On Linux we use Rockpi_x_win10_installer to make a bootable USB drive.
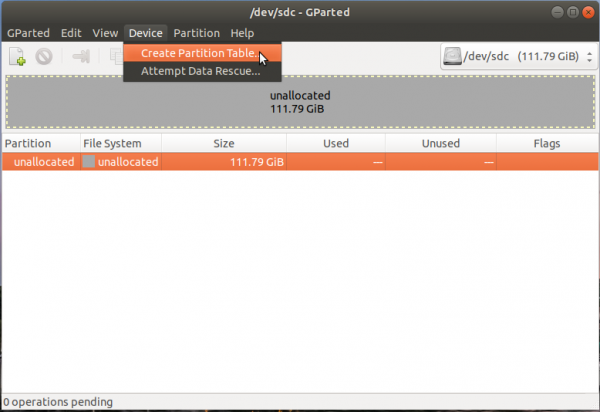
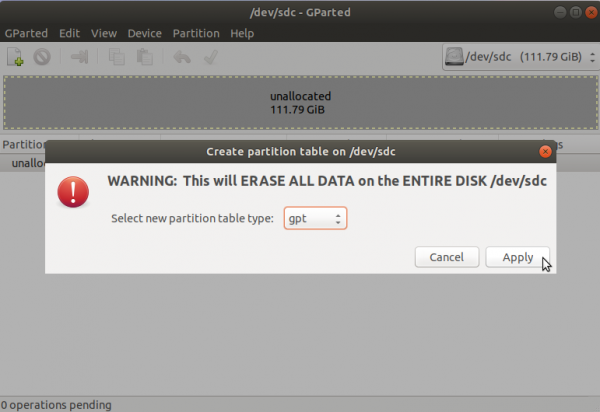
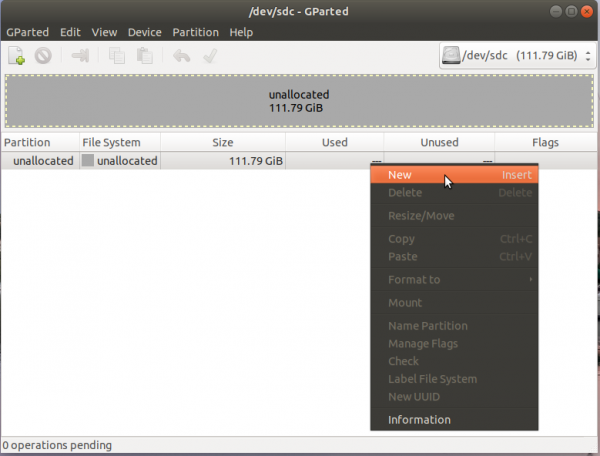
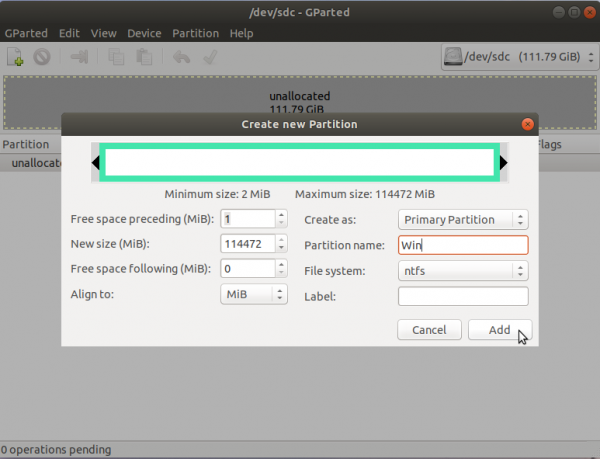
1. First use the gparted tool to format the U disk.
How to install the gparted:
$ sudo apt-get install gparted -y
How to use the gparted:
1.Create partition table.
2. Create partition and format.
3. You will need to download rockpi_x_win10_installer.tar.gz and unzip it to the root directory of the USB flash drive,U disk directory structure is as follows:
.
├── Boot
├── bootmgr
├── DriverInfolist.txt
├── EFI
└── Images
4. You will need to download Install.WIM (You can use the Dism tool to capture the desired .wim image) and put it in the Images directory.
.
├── Boot
├── bootmgr
├── DriverInfolist.txt
├── EFI
└── Images
                ├── Install.WIM
                ├── unattend.xml
                └── Winre.wim
Step 2: Boot from USB disk
1. Plug the USB drive on ROCK Pi X, if your USB drive is USB 3.0, plug it to the ROCK Pi X USB 3.0 port is preferred.
2. Plug keyboard and HDMI monitor on ROCK Pi X
3. Power on the ROCK Pi X, keep pressing DEL on the keyboard until the BIOS screen is on HDMI
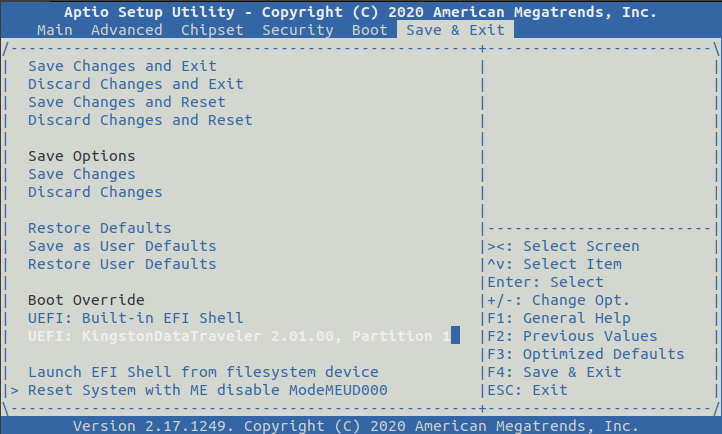
4. Go the last tab [Save & Exit] -> [Boot Override] of BIOS menu, select your USB drive and press Enter to boot.
Step 3: Deploy
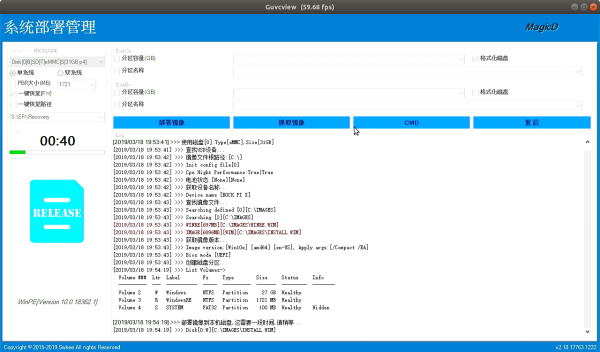
After waiting for a while, you will see the following deployment interface:
After deployment, ROCK PI X will be restarted automatically.
FAQs
Troubleshooting
- Post your issue at the forum: https://forum.radxa.com/c/rockpiX/win

