Rock2/square bb/start
Getting start with rock2 square board.
Contents
[hide]Preperation
The rock2 square package comes with the following items:
- rock2 SoM x 1
- square base board x 1
- usb to dc power cable x 1
- sata cable x 1
- wifi antenna
- M3 screws x 2
You also need the following items to get the board working.
- Power adapter, 5V/2A is a must, if you want to connect 2.5 inch SATA disk, 5V/3A is a must
- HDMI cable to connect to TV or monitor with HDMI input
- Mouse or keyboard for input
Additional, it will be better if you have the following:
- Micro USB OTG cable, you need it to connect to PC
- 2.5 inch disk, you can have much more storage other than on board storage
- CR1220 RTC battery, to keep time when you shutdown the device. The device will get the time from network without RTC battery.
- Wired or wireless network
Install the SoM
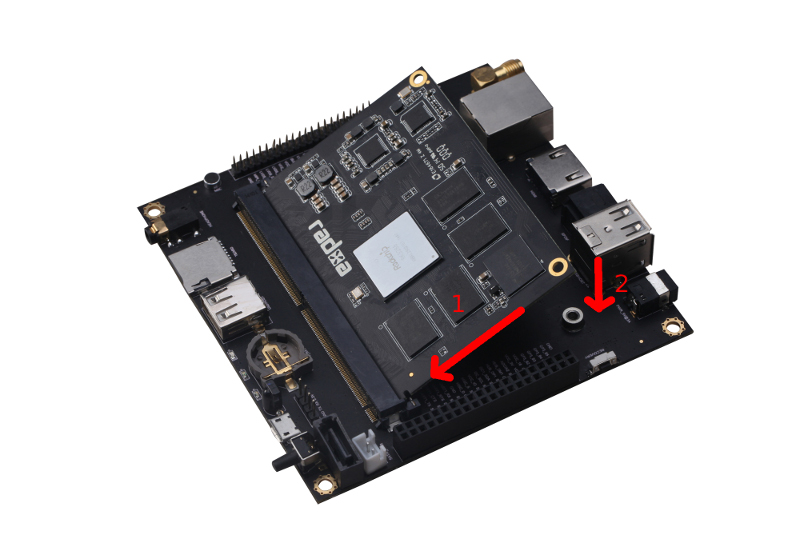
The SoM has the CPU, memory and storage on it(which has been pre-installed OS on it). If you haven't setup the SoM on the base board, follow the picture below to install the SoM.
- inset the SoM gold finger to the connector with an angle of about 30 degree until the gold finger reach the end of the connector
- press the mounting hole of the SoM and use screw to mount it on the base board
like the picture below:
(Re)Install the OS(optional)
The rock2 SoM is pre installed OS out of the factory, there are two flavors, Android 4.4 or Rabian. If you want to change it, you can install the OS manually. The Image for rock2 square can be downloaded from the following url.
http://dl.radxa.com/rock2_square/images
Choose the image as you like and download it. It should be xxx_emmc.img, which is for rock2 square on board eMMC storage. Let the board goto loader mode, and follow the instructions at flash the image page.
Connecting the cables
Basically you need to connect power and HDMI cable.
Powering on
The Power Led should be on after you connect the power, the Green Status Led should start blinking after some seconds, it shows that the system is booting. There should be images on the HDMI after then.

