Difference between revisions of "Rock/Serial debug tools Setting"
PeiYao Wang (Talk | contribs) (Created page with "===Serial debug tools Setting under Windows=== Here we use putty as an example to show us how to set the serial debug tools. Double click the Putty.exe, you will see the int...") |
|||
| Line 1: | Line 1: | ||
| − | === | + | __TOC__ |
| + | |||
| + | This page describe how to set up and debug the radxa rock board via serial console. | ||
| + | |||
| + | ===Windows=== | ||
Here we use putty as an example to show us how to set the serial debug tools. | Here we use putty as an example to show us how to set the serial debug tools. | ||
| Line 18: | Line 22: | ||
[[File:serial_debug_3.png]] | [[File:serial_debug_3.png]] | ||
| − | === | + | ===Linux=== |
Here we still use putty as an example. | Here we still use putty as an example. | ||
when start putty firstly you will see this interface: | when start putty firstly you will see this interface: | ||
| Line 36: | Line 40: | ||
usbserial /dev/ttyUSB 188 0-253 serial | usbserial /dev/ttyUSB 188 0-253 serial | ||
| − | which tell us the driver is ok, then cd /dev/ to confirm whether is there device named ttyUSB* . you can | + | which tell us the driver is ok, then cd /dev/ to confirm whether is there device named ttyUSB* . you can unplug and then plug the usb to get the right device. |
[[File:serial_debug_linux_3.png]] | [[File:serial_debug_linux_3.png]] | ||
Revision as of 06:13, 14 December 2013
This page describe how to set up and debug the radxa rock board via serial console.
Windows
Here we use putty as an example to show us how to set the serial debug tools.
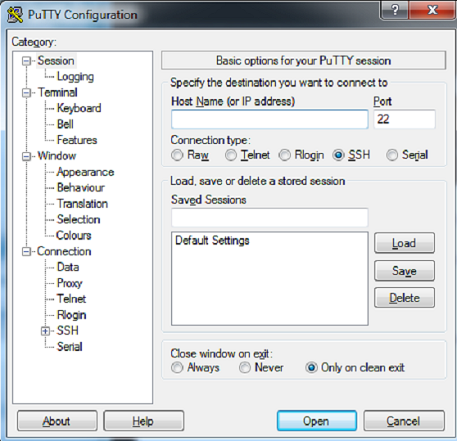
Double click the Putty.exe, you will see the interface like:
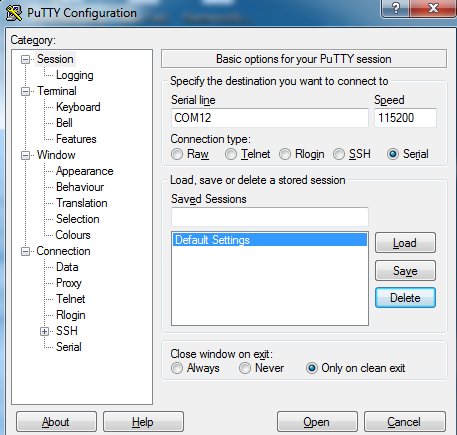
Select the Serial, Fill the Serial line with the right serial port,and the Speed with 115200
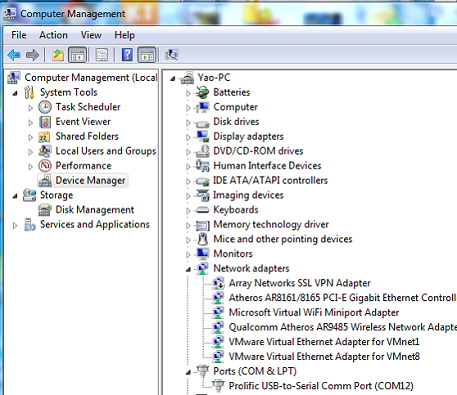
You can get the serial port here:
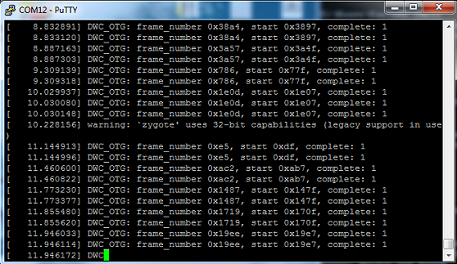
Finish setting , Click Open the putty will work
Linux
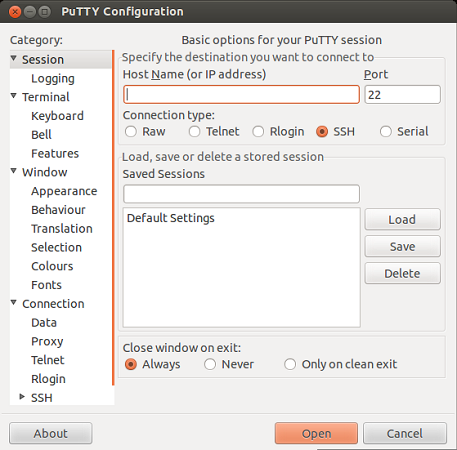
Here we still use putty as an example. when start putty firstly you will see this interface:
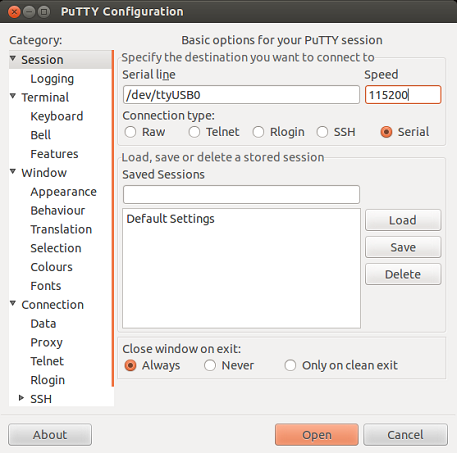
Select the Serial, Fill the Serial line with the right serial port,and the Speed with 115200
How to get the serial port .First cat /proc/tty/drivers, to make sure is there driver support(radxa board is connected with pc via USB so the device name should be usbserial)
Here we find the line
usbserial /dev/ttyUSB 188 0-253 serial
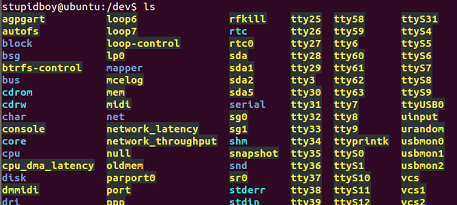
which tell us the driver is ok, then cd /dev/ to confirm whether is there device named ttyUSB* . you can unplug and then plug the usb to get the right device.
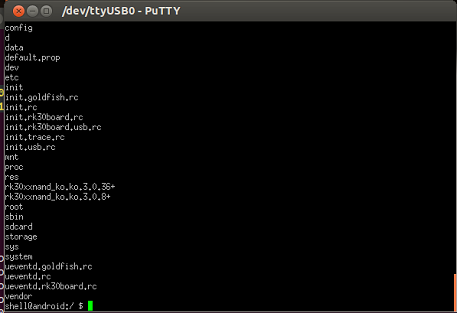
Finish setting, Click Open the putty will work!
Note:
1、Under Ubuntu If you got the following error – “Unable to open connection to: Unable to open serial port“. you can see
http://jesin.tk/fix-serial-port-permission-denied-errors-linux/

