Difference between revisions of "Taco"
| (13 intermediate revisions by 3 users not shown) | |||
| Line 1: | Line 1: | ||
| − | + | __NOTOC__ | |
| − | Radxa Taco is a complete NAS/Router solution designed based on the Raspberry Pi Compute Module 4. It utilizes the high-speed PCIe buses on CM4 for ultra fast network connectivity and storage IO. It comes with the following features: | + | {{Languages|Taco}} |
| + | |||
| + | [[Home | Home]] > [[Taco | Taco NAS]] | ||
| + | |||
| + | === Introduction === | ||
| + | [[File:Taco.png | 500px | right]] | ||
| + | Radxa Taco is a complete NAS/Router solution designed based on the Raspberry Pi Compute Module 4. It utilizes the high-speed PCIe buses on CM4 for ultra-fast network connectivity and storage IO. It comes with the following features: | ||
| + | |||
| + | [[File:Taco_rpi.jpeg | 500px]] | ||
| + | |||
| + | (Image credit: [https://github.com/geerlingguy/raspberry-pi-pcie-devices/issues/268 @geerlingguy]) | ||
* Up to 5x HDD/SSD, support 2.5inch or 3.5inch SSD | * Up to 5x HDD/SSD, support 2.5inch or 3.5inch SSD | ||
| − | * High speed PCIe switch for SATA & Ethernet | + | * High-speed PCIe switch for SATA & Ethernet |
* One 2.5G Ethernet and one native GbE | * One 2.5G Ethernet and one native GbE | ||
* One M.2 M Key for NVMe SSD | * One M.2 M Key for NVMe SSD | ||
* One M.2 E Key for WiFi 6 modules or Google Coral AI module | * One M.2 E Key for WiFi 6 modules or Google Coral AI module | ||
| − | * 12V DC power input for 2.5 and 3.5 inch HDD | + | * 12V DC power input for 2.5 and 3.5-inch HDD |
* External standard ATX power supply support for 3.5inch HDD | * External standard ATX power supply support for 3.5inch HDD | ||
* Support HDD suspend mode | * Support HDD suspend mode | ||
| − | * Support software RAID 0/1/5 | + | * Support software RAID 0/1/5/10 |
* Support USB Direct Access Mode from PC(USB 2.0 only) | * Support USB Direct Access Mode from PC(USB 2.0 only) | ||
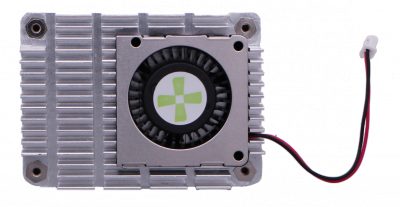
* Optional PWM control fan for HDD heat dispatching | * Optional PWM control fan for HDD heat dispatching | ||
* Optional OLED display for system info such as IP address or Storage usage | * Optional OLED display for system info such as IP address or Storage usage | ||
| − | + | ==== Detail of the board ==== | |
| − | + | [[File:Taco-front.png | 560px]] | |
| + | [[File:Taco-back.png | 800px]] | ||
| + | |||
| + | ==== Third Party Case ==== | ||
| + | |||
| + | * https://www.thingiverse.com/thing:5838894 | ||
| + | |||
| + | === Getting Started === | ||
| + | |||
| + | ==== Installation OS ==== | ||
| + | |||
| + | ===== for Raspberry Pi CM4 ===== | ||
| + | |||
| + | 1. Download an image from here https://www.raspberrypi.com/software/operating-systems/ | ||
| + | |||
| + | 2. Clone usbboot and compile it | ||
| + | |||
| + | sudo apt install git libusb-1.0-0-dev pkg-config | ||
| + | git clone --depth=1 https://github.com/raspberrypi/usbboot | ||
| + | cd usbboot | ||
| + | make | ||
| + | |||
| + | 3. Hold down the maskrom key, connect the computer using the A-A cable, and release the maskrom key | ||
| + | |||
| + | 4. Run rpiboot and view the CM4 device | ||
| + | |||
| + | sudo ./rpiboot | ||
| + | lsblk # assume that CM4 is /dev/sdx | ||
| + | |||
| + | 5. Burn the image to CM4 | ||
| + | |||
| + | xz -d /path/to/yymmdd-raspios-bullseye-xx.img.xz | ||
| + | sudo dd if=/path/to/yymmdd-raspios-bullseye-xx.img of=/dev/sdx status=progress | ||
| + | |||
| + | |||
| + | ===== for Radxa CM3 ===== | ||
| + | * TBD | ||
| + | |||
| + | ==== Software support ==== | ||
| + | |||
| + | [[File:Taco-fan.png | 400px]] | ||
| + | |||
| + | We have provided a script to help control the Taco fan. | ||
| + | |||
| + | curl -sL https://rock.sh/get-taco | sudo -E bash - | ||
| + | |||
| + | Just copy the command above and paste it into the terminal and press enter. | ||
| + | |||
| + | ==== Power Options ==== | ||
| + | |||
| + | {| class="wikitable" | ||
| + | ! | ||
| + | ! Power Consumption | ||
| + | |- | ||
| + | | SSD | ||
| + | | <3W | ||
| + | |- | ||
| + | | 2.5 HDD | ||
| + | | 3 ~ 5W | ||
| + | |- | ||
| + | | 3.5 HDD | ||
| + | | 5 ~10W | ||
| + | |} | ||
| + | |||
| + | ===== Option 1: Power from DC (5.5*2.5) ===== | ||
| + | |||
| + | We recommend using a 12V/5A power adapter with interface DC 5525 to ensure stable power supply and optimal performance of the device. | ||
| + | |||
| + | ===== Option 2: Power from ATX PSU ===== | ||
| + | |||
| + | If you plan to put the Taco in a PC enclosure, then you can use the ATX PSU. Mostly ATX PSU can meet the power requirement. You need an ATX Floppy cable to power the Taco. | ||
| + | |||
| + | ==== Known Issues ==== | ||
| + | * Booting from M.2 NVMe SSD is not supported since there is no driver for the PCIe switch on the Taco in the Raspberry Pi bootloader. | ||
Latest revision as of 07:14, 22 July 2024
Home > Taco NAS
Introduction
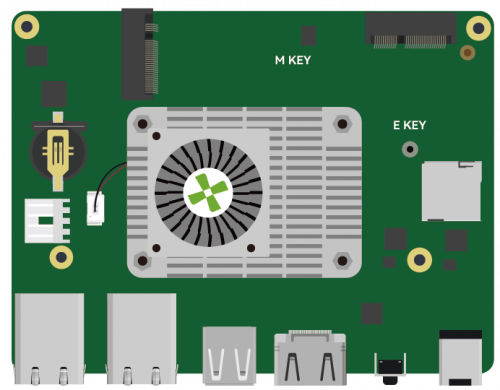
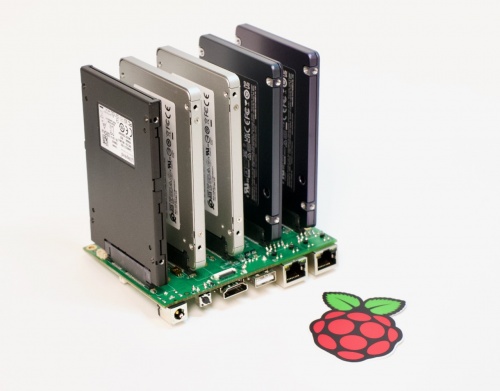
Radxa Taco is a complete NAS/Router solution designed based on the Raspberry Pi Compute Module 4. It utilizes the high-speed PCIe buses on CM4 for ultra-fast network connectivity and storage IO. It comes with the following features:
(Image credit: @geerlingguy)
- Up to 5x HDD/SSD, support 2.5inch or 3.5inch SSD
- High-speed PCIe switch for SATA & Ethernet
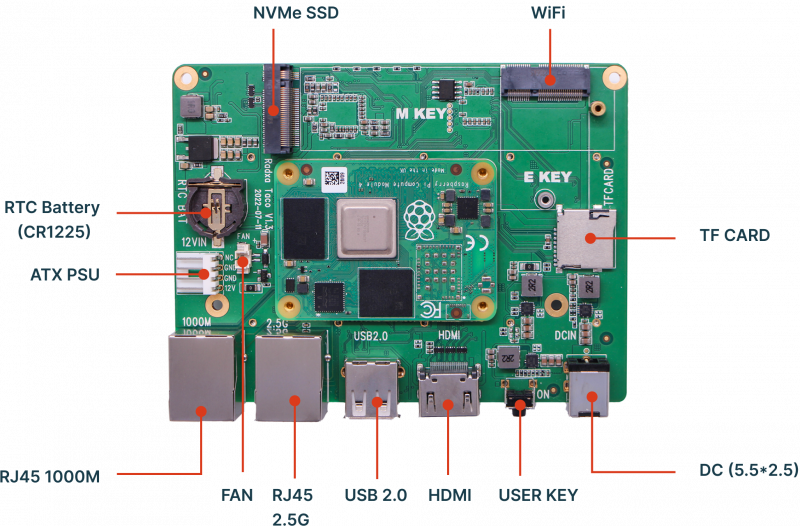
- One 2.5G Ethernet and one native GbE
- One M.2 M Key for NVMe SSD
- One M.2 E Key for WiFi 6 modules or Google Coral AI module
- 12V DC power input for 2.5 and 3.5-inch HDD
- External standard ATX power supply support for 3.5inch HDD
- Support HDD suspend mode
- Support software RAID 0/1/5/10
- Support USB Direct Access Mode from PC(USB 2.0 only)
- Optional PWM control fan for HDD heat dispatching
- Optional OLED display for system info such as IP address or Storage usage
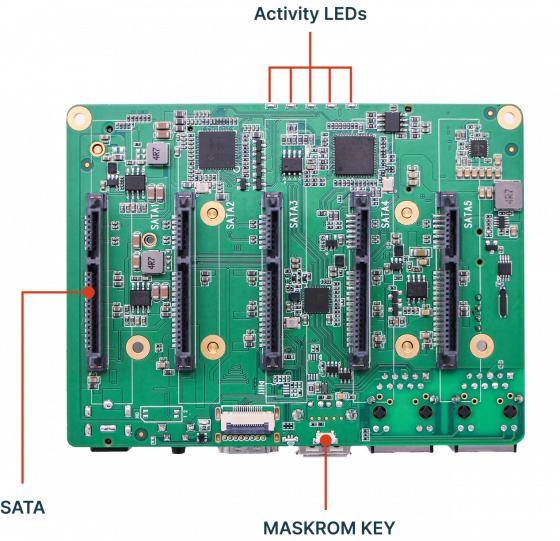
Detail of the board
Third Party Case
Getting Started
Installation OS
for Raspberry Pi CM4
1. Download an image from here https://www.raspberrypi.com/software/operating-systems/
2. Clone usbboot and compile it
   sudo apt install git libusb-1.0-0-dev pkg-config
   git clone --depth=1 https://github.com/raspberrypi/usbboot
   cd usbboot
   make
3. Hold down the maskrom key, connect the computer using the A-A cable, and release the maskrom key
4. Run rpiboot and view the CM4 device
   sudo ./rpiboot
   lsblk    # assume that CM4 is /dev/sdx
5. Burn the image to CM4
  xz -d /path/to/yymmdd-raspios-bullseye-xx.img.xz
  sudo dd if=/path/to/yymmdd-raspios-bullseye-xx.img of=/dev/sdx status=progress
for Radxa CM3
* TBD
Software support
We have provided a script to help control the Taco fan.
curl -sL https://rock.sh/get-taco | sudo -E bash -
Just copy the command above and paste it into the terminal and press enter.
Power Options
| Power Consumption | |
|---|---|
| SSD | <3W |
| 2.5 HDD | 3 ~ 5W |
| 3.5 HDD | 5 ~10W |
Option 1: Power from DC (5.5*2.5)
We recommend using a 12V/5A power adapter with interface DC 5525 to ensure stable power supply and optimal performance of the device.
Option 2: Power from ATX PSU
If you plan to put the Taco in a PC enclosure, then you can use the ATX PSU. Mostly ATX PSU can meet the power requirement. You need an ATX Floppy cable to power the Taco.
Known Issues
- Booting from M.2 NVMe SSD is not supported since there is no driver for the PCIe switch on the Taco in the Raspberry Pi bootloader.

